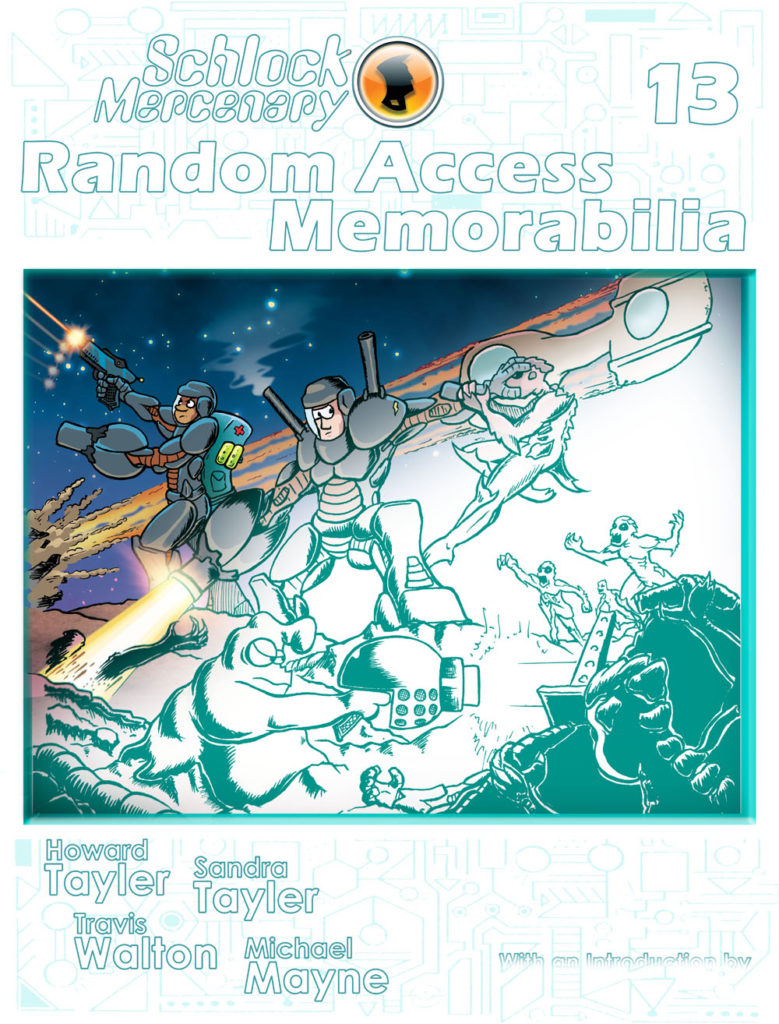
We’re doing the final layout work now, and the book is looking SO NICE. You can expect an updated cover reveal on Monday or Tuesday of next week.
We’re also designing the Bristlecone ship coin, per the stretch goal which we cleared early this week. We’ll reveal that design soon, but it’s not quite ready.
This may sound a bit counter-intuitive, but in order to make the right shirts, in order to make really nice ones, we need to spend some money up front. We need to do R&D. If the Random Access Memorabilia Kickstarter reaches its next stretch goal, we will spend a portion of this project’s proceeds (probably between $1,000 and $5,000) developing and prototyping t-shirts. We will then Kickstart a proper t-shirt project in February of 2018.
That link has all the details, but here are some bullet points:
Kickstarter and Backerkit are how we’ll be handling pre-orders for Random Access Memorabilia.
The funding period is just 24 days.
Books will begin shipping to backers in February of 2018.
For the next four weeks I’ll probably be something of a one-note symphony. Schlock Mercenary feeds (and houses, and educates, and transports, etc) our family, and the book collections are the largest part of how that happens.
We really look forward to putting this book in your hands. It’s one of my very favorites, and the bonus story is looking amazing.
On Monday, June 12th of the year 2000 the very first Schlock Mercenary strip appeared on the web.
Yesterday, Monday, June 12th of the year 2017 marked the seventeenth anniversary of that start date—seventeen years of uninterrupted¹ daily² updates here at schlockmercenary.com.
That I am now in my eighteenth year of doing this stands as evidence of ongoing good fortune. I’ve enjoyed seventeen full years without any sort of debilitating injury or crisis preventing me from working for more than a couple of weeks at a time. I’ve gotten sick and been injured, of course, but I keep getting better with sufficient time to spare.
At some point this streak will end. That point lies in the mists of a hopefully-distant future, and is not today.
Today I am making comics.
(Just as soon as I finish this blog post.)
If you would like to celebrate the beginning of Schlock Mercenary’s eighteenth year, you might consider sharing the strip with a friend. But whatever you do, don’t send them back to the very beginning. That would be cruel. Start here, with Book 12. Which, by serendipitous convenience³, is the most recent of the Schlock Mercenary stories to appear in print.
How long will Schlock Mercenary continue to run? The over-arching story is in its final act, and will draw to a close soon, probably in Book 19. But on the day following that big finish there will be another update, and another one the day after that. Those will launch a new story, featuring some characters you know, and a universe you think you know, but let’s not get ahead of ourselves. There is a satisfactory conclusion coming up, and you can enjoy it secure in the knowledge that it won’t end the delivery of daily strips here at schlockmercenary.com.
¹ There have been service interruptions, of course. Like that time the data center’s UPS failed, and a fire destroyed part of the facility. But Schlock Mercenary has updated every day, and with a bit of back-up hosting has never been unavailable for more than a few hours at a time.
² That’s 6,210 strips. Yes, the image files are backed up in more than one place.
³ A friend who also happens to be flush with the good fortune of a spot of discretionary income, might purchase that book as a gift. Shared links are lovely, but a thing made out of colorful paper is a thing that will be remembered.
In this post I’ll explain in detail how you too can turn your fancy Deluxe Game Chief’s “Handbrain” Screen from slick, dry-erase-compatible ABS plastic to a battered, rusty piece of equipment that has seen better centuries.
A Disclaimer Meant to Give You Hope
Sandra did all the modding work shown here, and she is a beginner. I explained the processes and provided tools, but she is the one who applied all the paint. This was her second experience with spray paint, and her first experience with glazing and dry-brushing, so while the results are perhaps a bit less polished than if I’d done the work, they’re easily within the reach of somebody who is new to hobby painting.
This tutorial is long, but the actual process goes very quickly, and most of the time you spend on the project will be spent waiting for things to dry between steps.
Let’s go!
Modding Your Handbrain
Supplies & Tools
Supplies for the “Rusty Iron” mod
You will need the following:
The Handbrain Screen (or anything else that will take spray paint, and that needs to look rusty)
Two large pieces of cardboard (work surfaces)
Paper towels
Letter or A4 paper, folded or cut in half.
Scissors
CA glue (“Superglue”)
Sandpaper or a sanding sponge
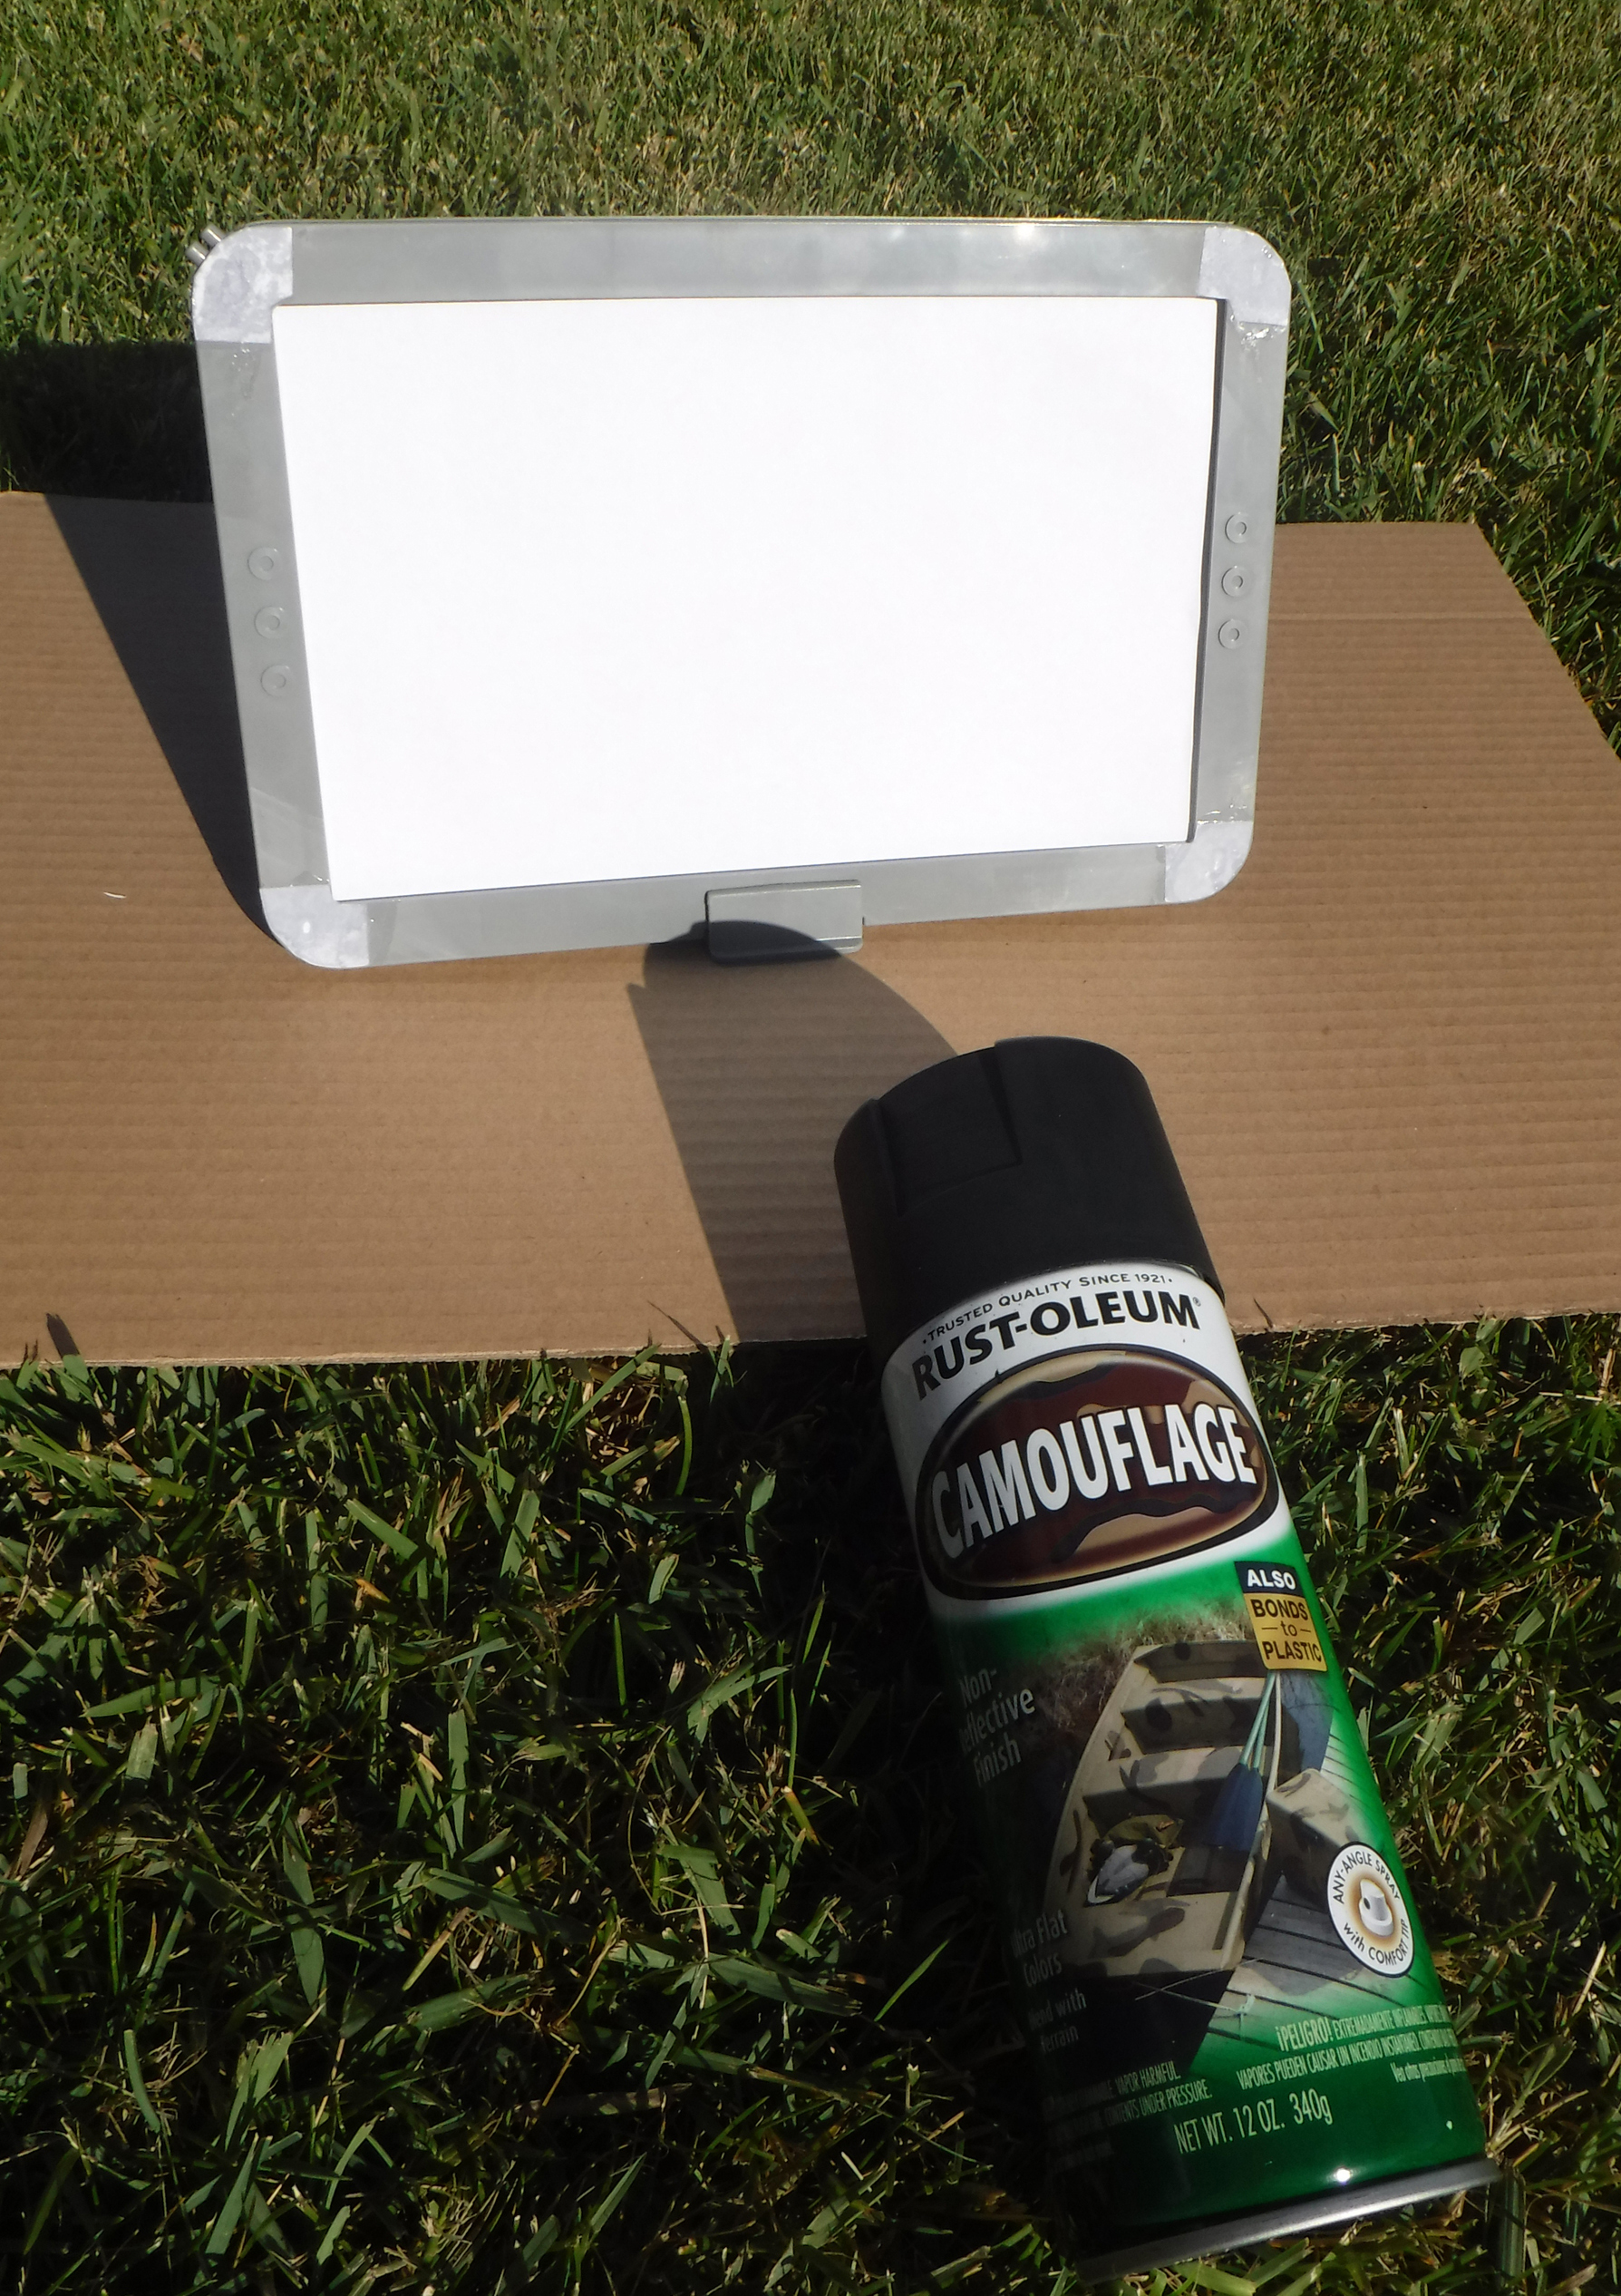
Ultra-flat black spray paint (Rustoleum® Camoflage Black is my favorite)
Testors Dullcote spray lacquer
P3® hobby paints: “Bloodstone” and “Pig Iron”
Two paint brushes—one for the rust wash, and one for dry-brushing.
Water for thinning paint and rinsing brushes
Q-tips (not shown in photo)
Something to mix paint on (not shown in photo. Sandra used a paper plate.)
With the exception of the paint, brushes, and sanding sponge, everything here is probably already in your house. If not, the total cost of these supplies is between $20 and $30, unless you go all-in on fancy brushes, which we did not.
The P3 paints are available from your friendly local game store, and from lots of online shops as well. Each bottle costs about $4. Any metallic acrylic hobby paint can be used in place of the Pig Iron, but I have not found an acceptable “rust wash” substitute for Bloodstone.
Phase 1: Surface Prep
In which we add a little of our own texture to the surface, and get it ready for paint.
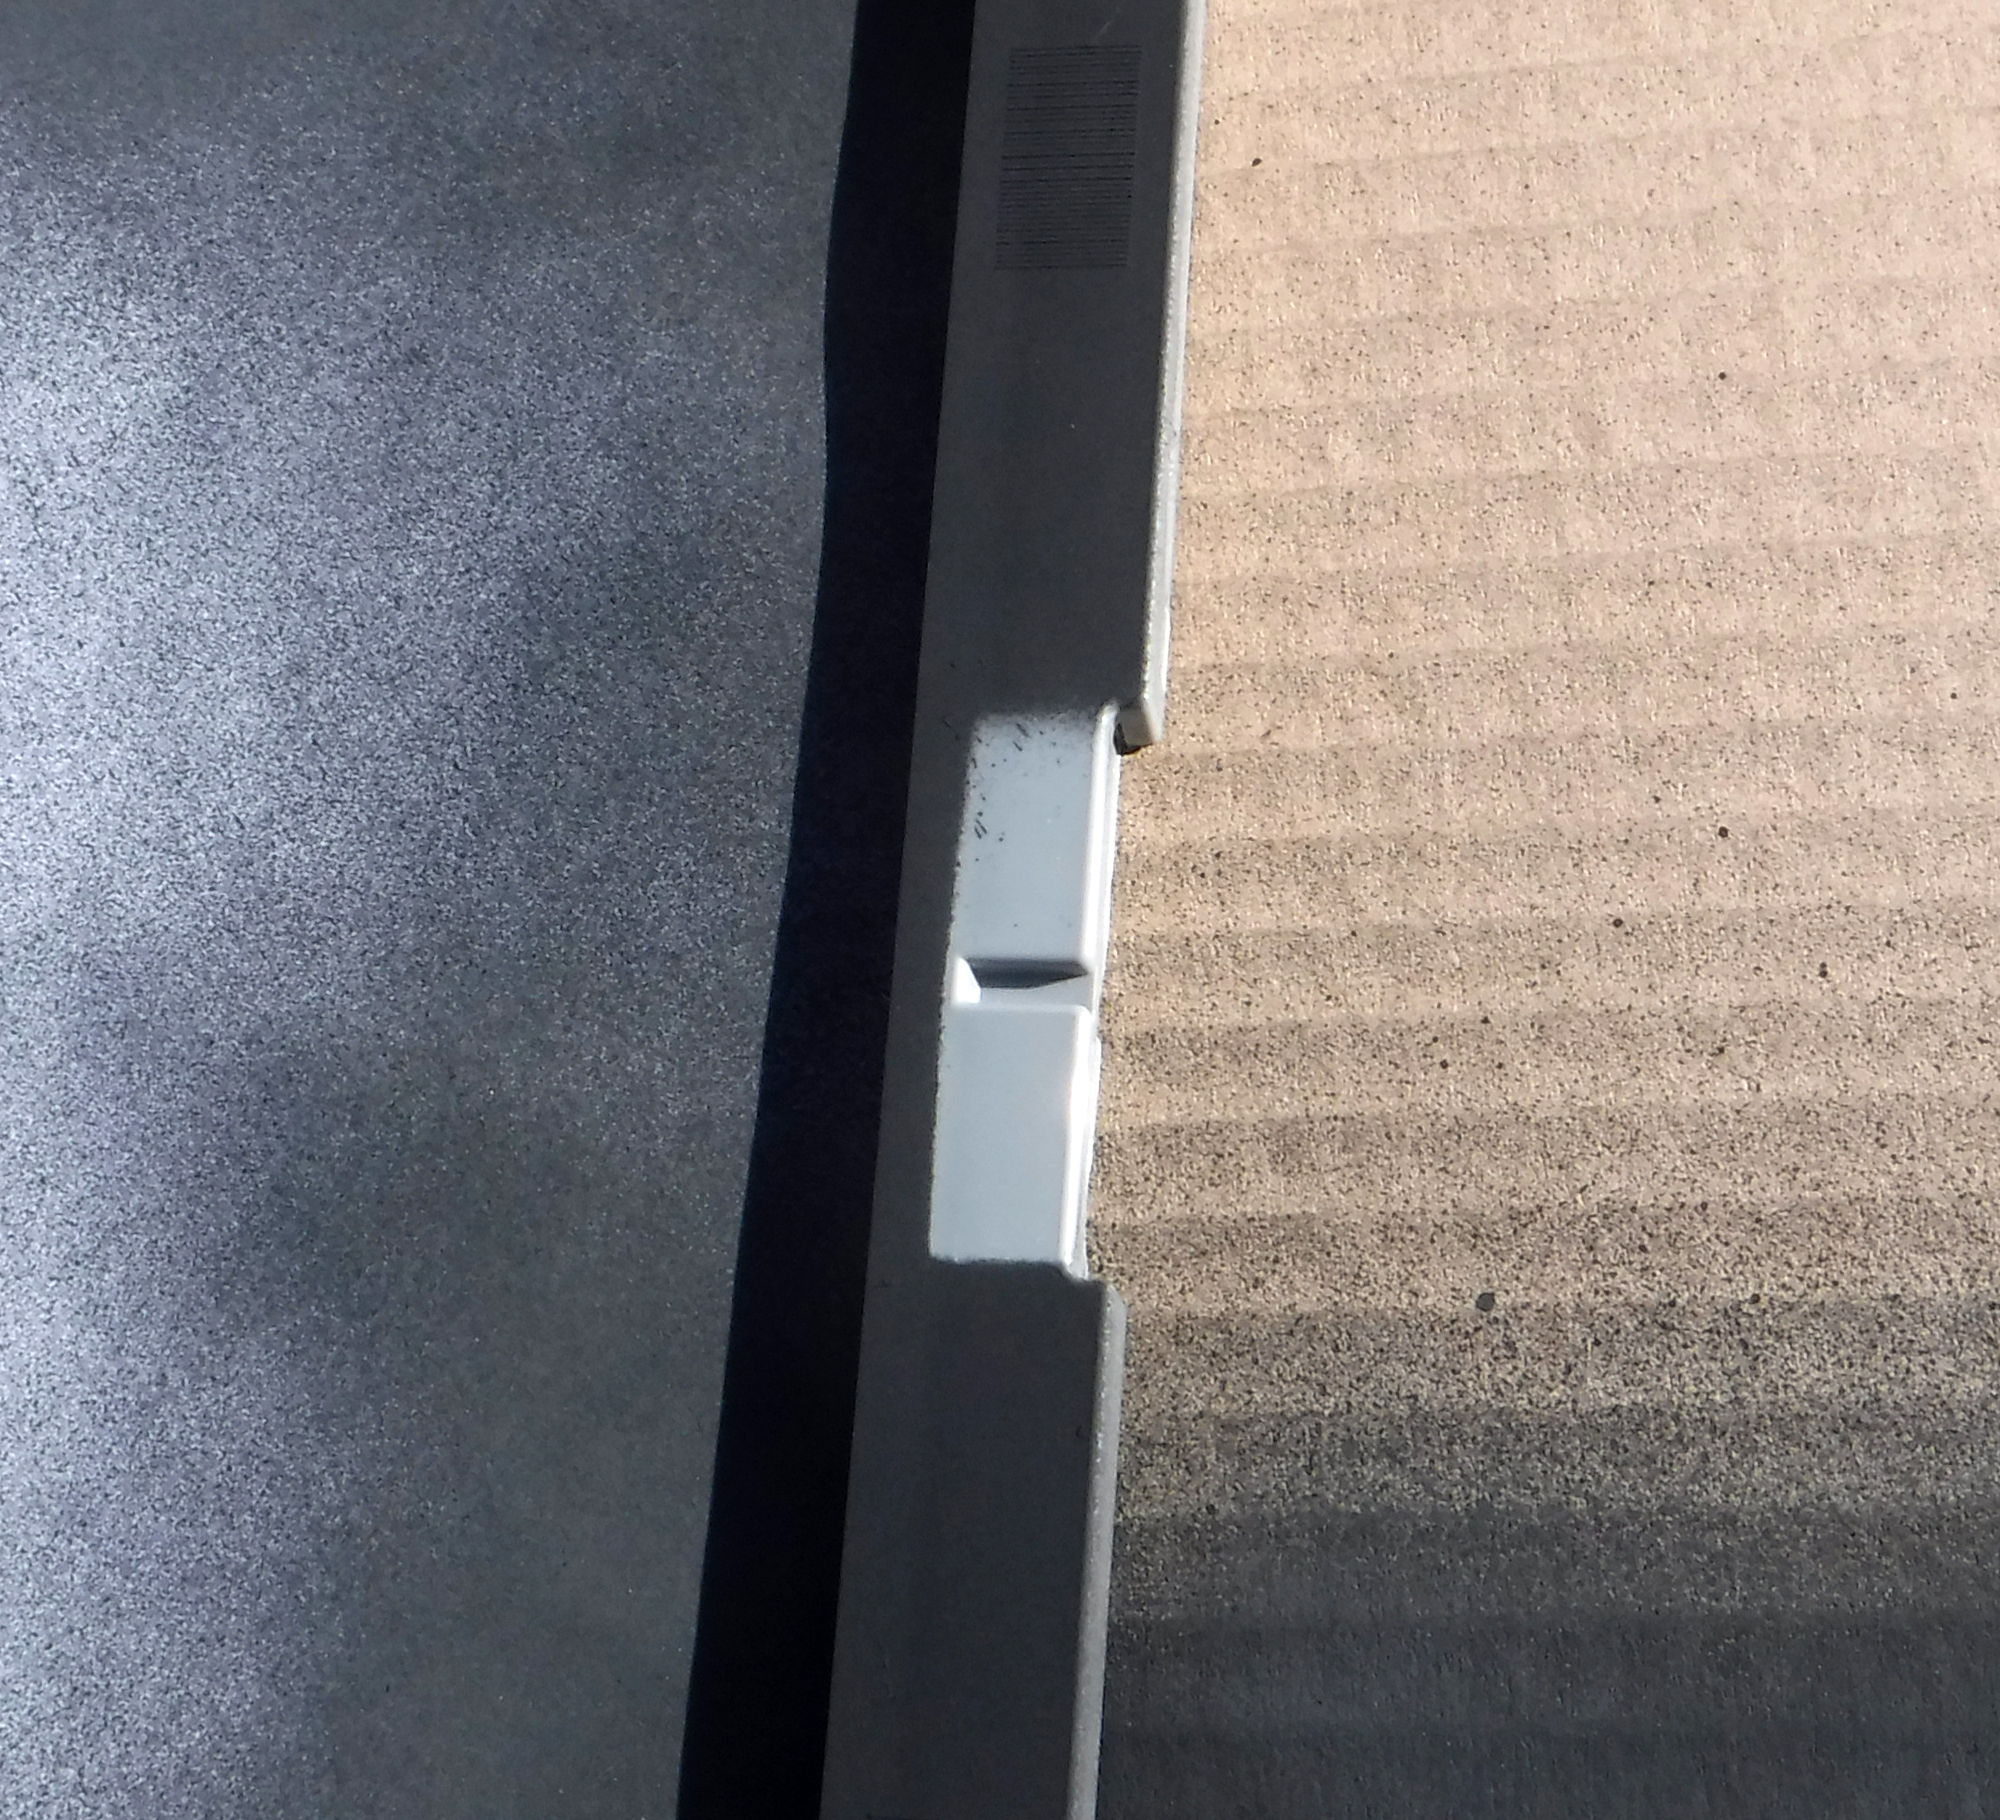
Sand the corners of the screen
If you’re feeling really plucky, take the scissors and score some “battle damage” in places.
Wipe it down with a damp paper towel, and then wipe it dry. This is the only critical step here. The sanding and scoring is just for show.
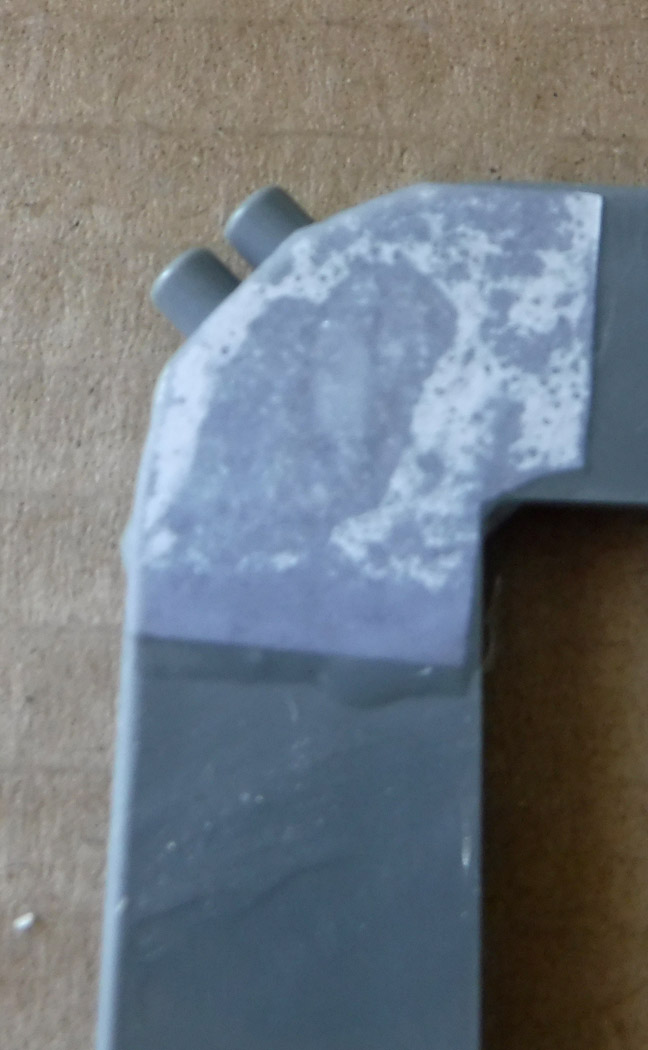
Phase 2: Patch and Customize
Superglue + paper = welded metal patch
Cut paper patches for the eight holes in the corners of the screen.
DO ALL GLUE THINGS ON DISPOSABLE CARDBOARD WORK SURFACE. Because superglue is forever.
Carefully, drop-by-drop, create a bead of superglue around the hole.
Lay a paper patch over the hole. It will wick up the glue and change color.
Using a Q-tip, flatten the paper. As necessary, add another drop of superglue, and spread that with the Q-tip.
Repeat steps 3-5 for the remaining 3 corners on this face.
Wait for the glue to dry. It will dry faster in humid environments because superglue does not “dry,” it “cures” by bonding with water. (This, incidentally, is why you don’t wash wet superglue from your body using water. Wipe it off with a dry paper towel. The driest you can find, but be quick…)
Flip the screen over, and repeat steps 3-7 for the four corner holes on the back.
Feeling plucky? Cut some more paper into cool shapes, and glue those down. By now you’ll feel pretty confident in your process. Sandra did!
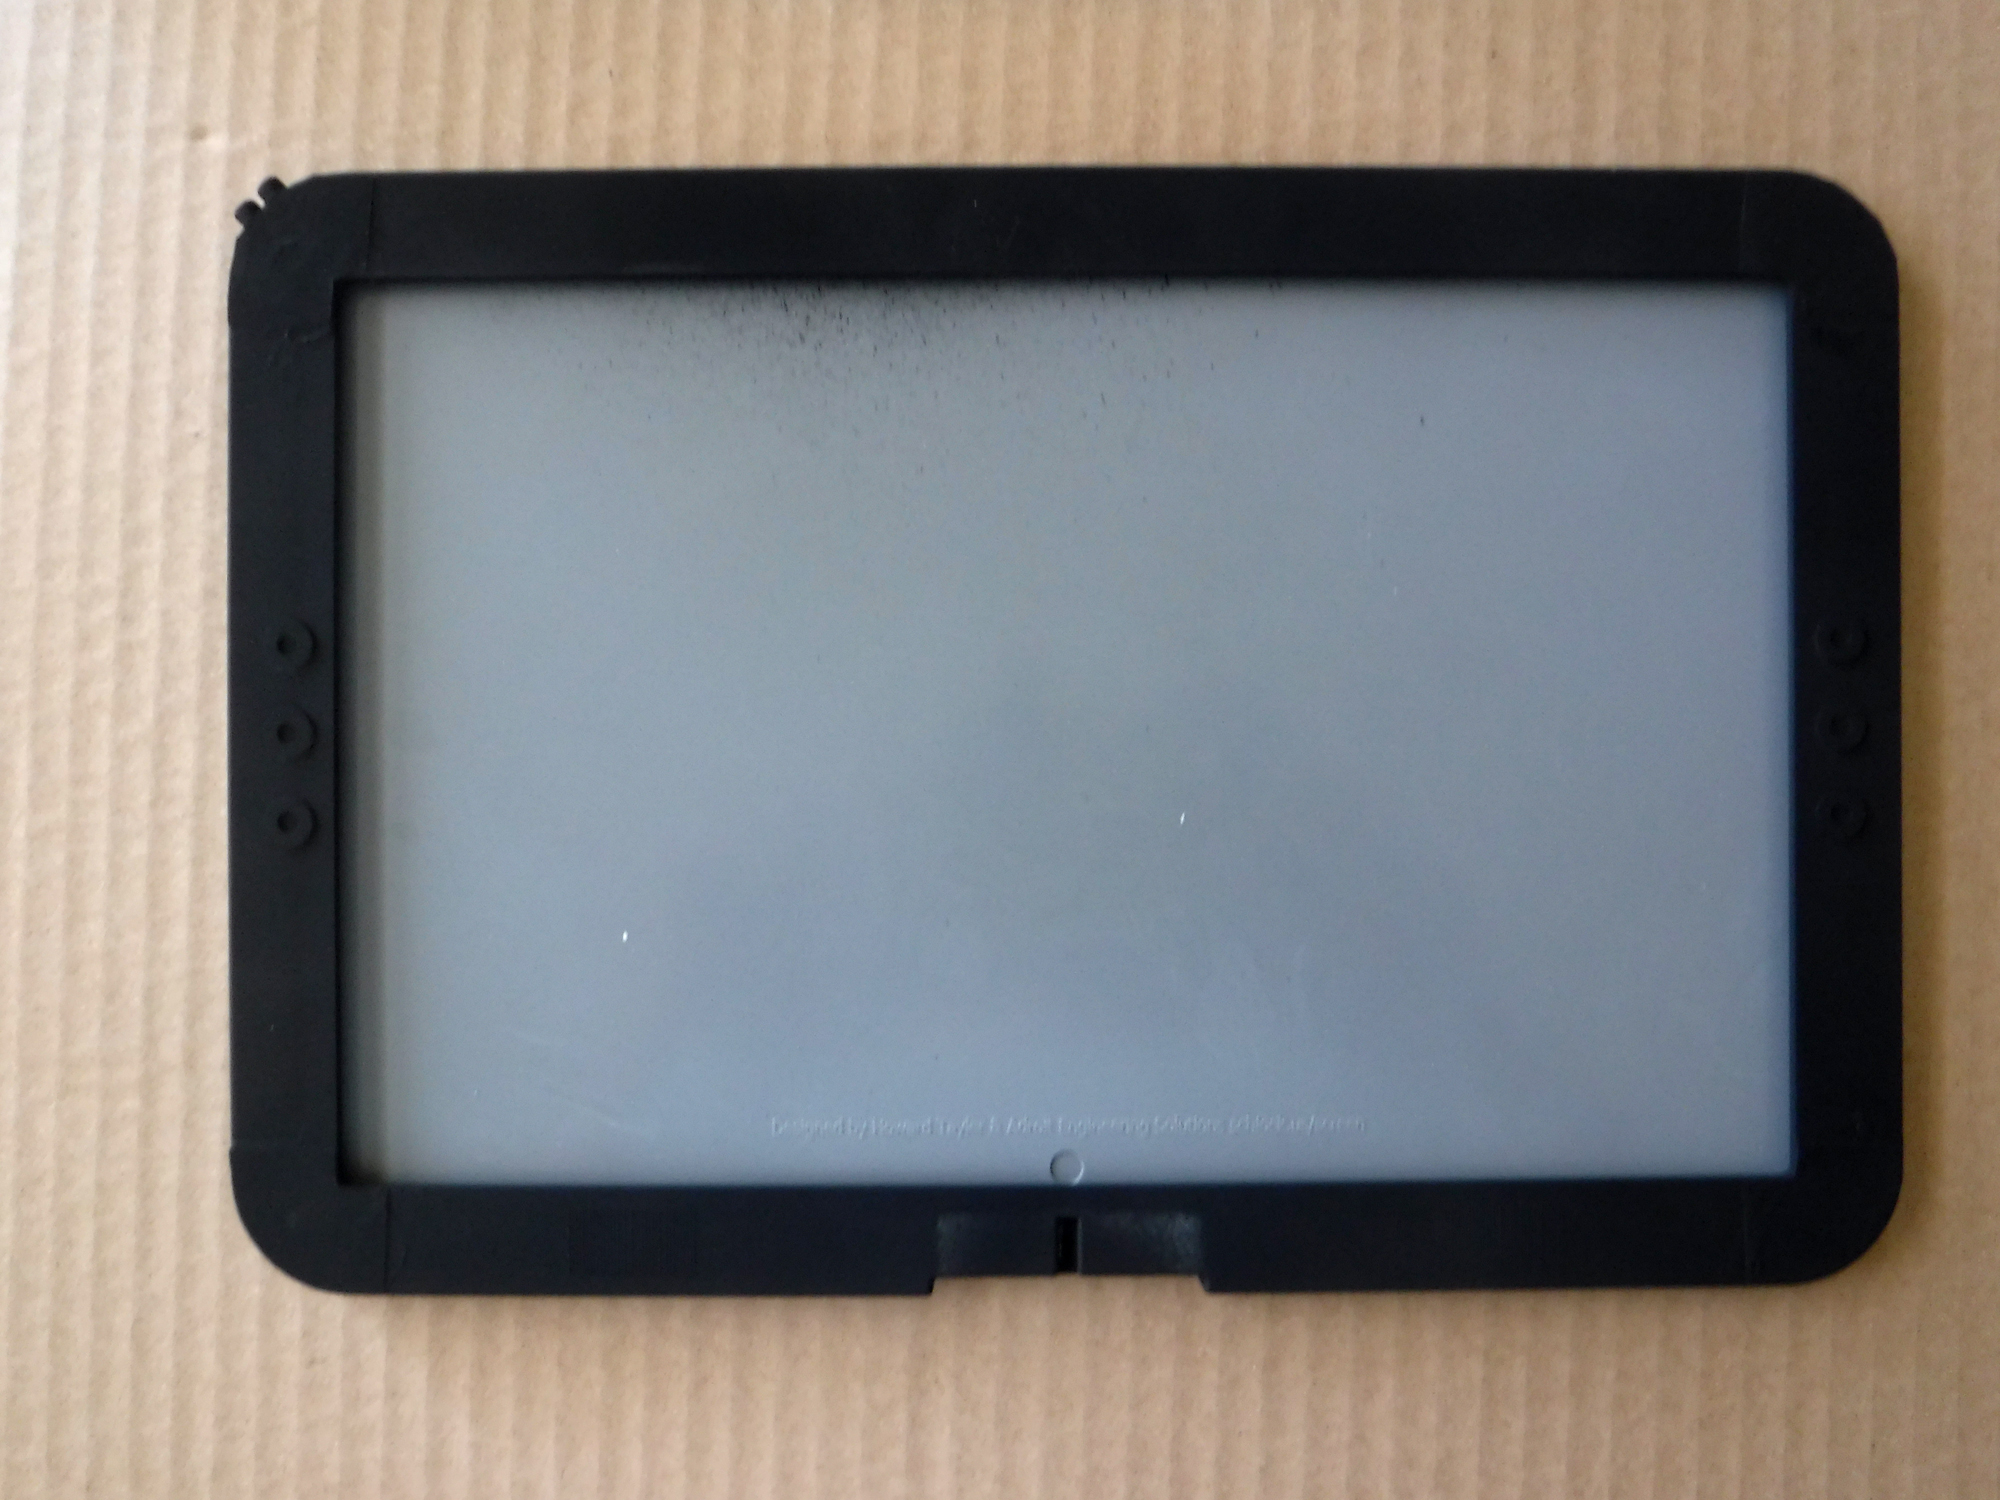
Roughed up with sanding, and custom-textured with superglue and plain old paper
Phase 3: Spray Paint!
If you’ve spray-painted things before this whole section will seem like too many words.
Find a good place, like and outdoor place, to paint. Use your cardboard to prevent painting things that should remain unpainted.
Stand the screen on its base, and insert a sheet of paper to mask the inside surface of the screen.
Apply spray paint to the front of the screen and the back of the base (but not the back of the screen) according to the instructions on the can
Wait for it to dry. Ten to twenty minutes, unless you over-sprayed and made puddles. The ultra-flat finish paint is only shiny when it’s still wet, so you don’t need to touch the surface to check for dryness.
Flip screen in stand. Paint the back of it (now that it’s at an angle which is easy to get at.)
Again, the waiting.
Remove the screen from the stand. See the bit that was masked by the base? Very lightly spray that part, front and back.
More waiting.
Ready for Phase 4!
Phase 4: Getting Rusty
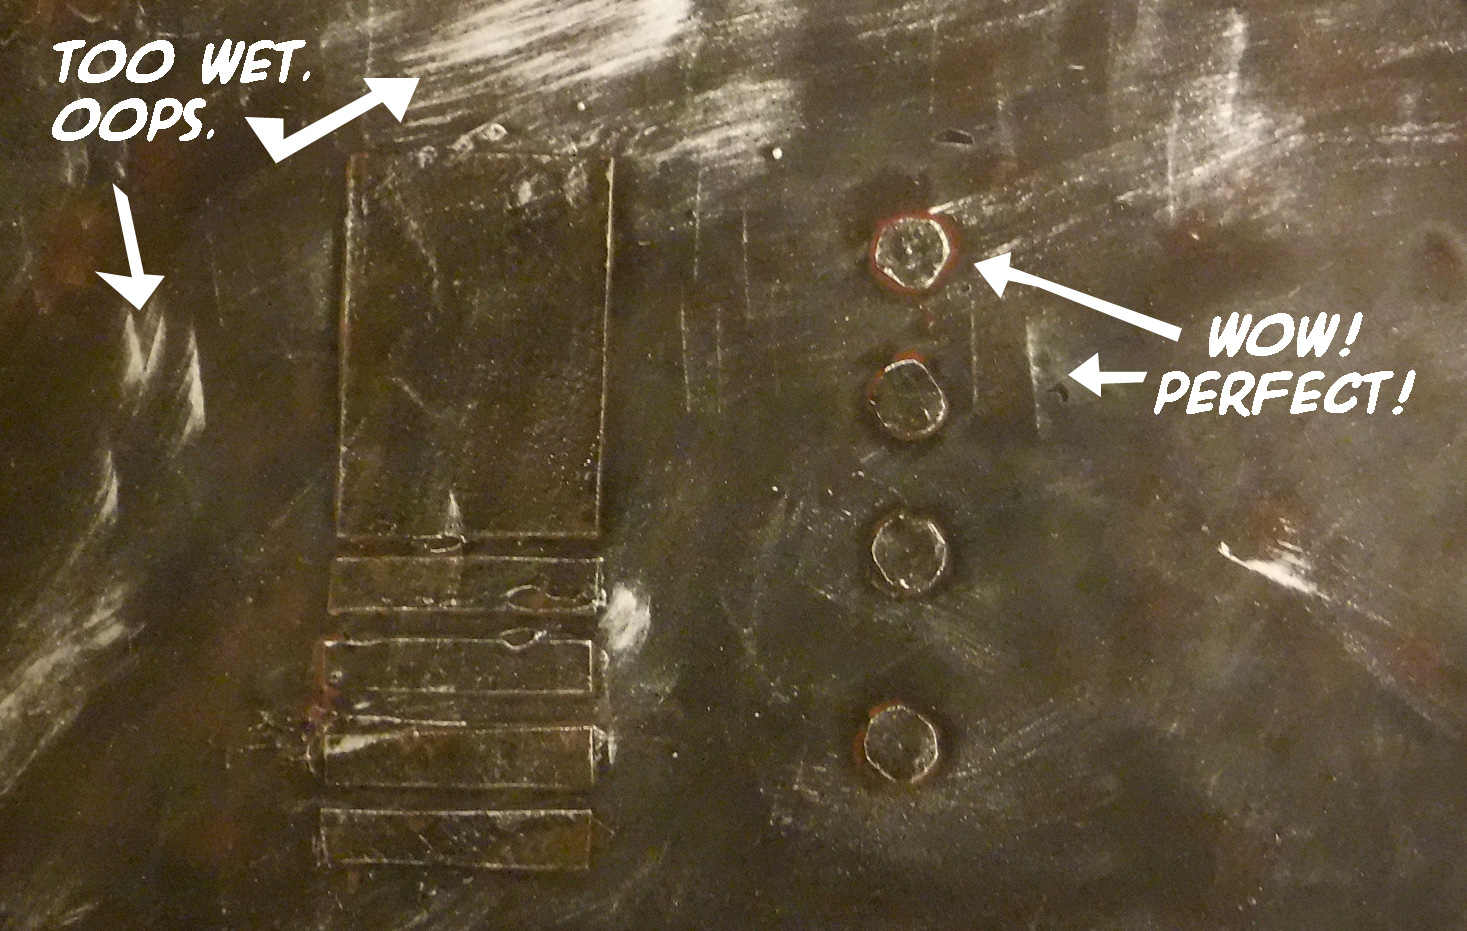
Thanks to quirks in the formulation of P3 Bloodstone, this step is like magic. It looks terrible, and then suddenly it looks perfect.
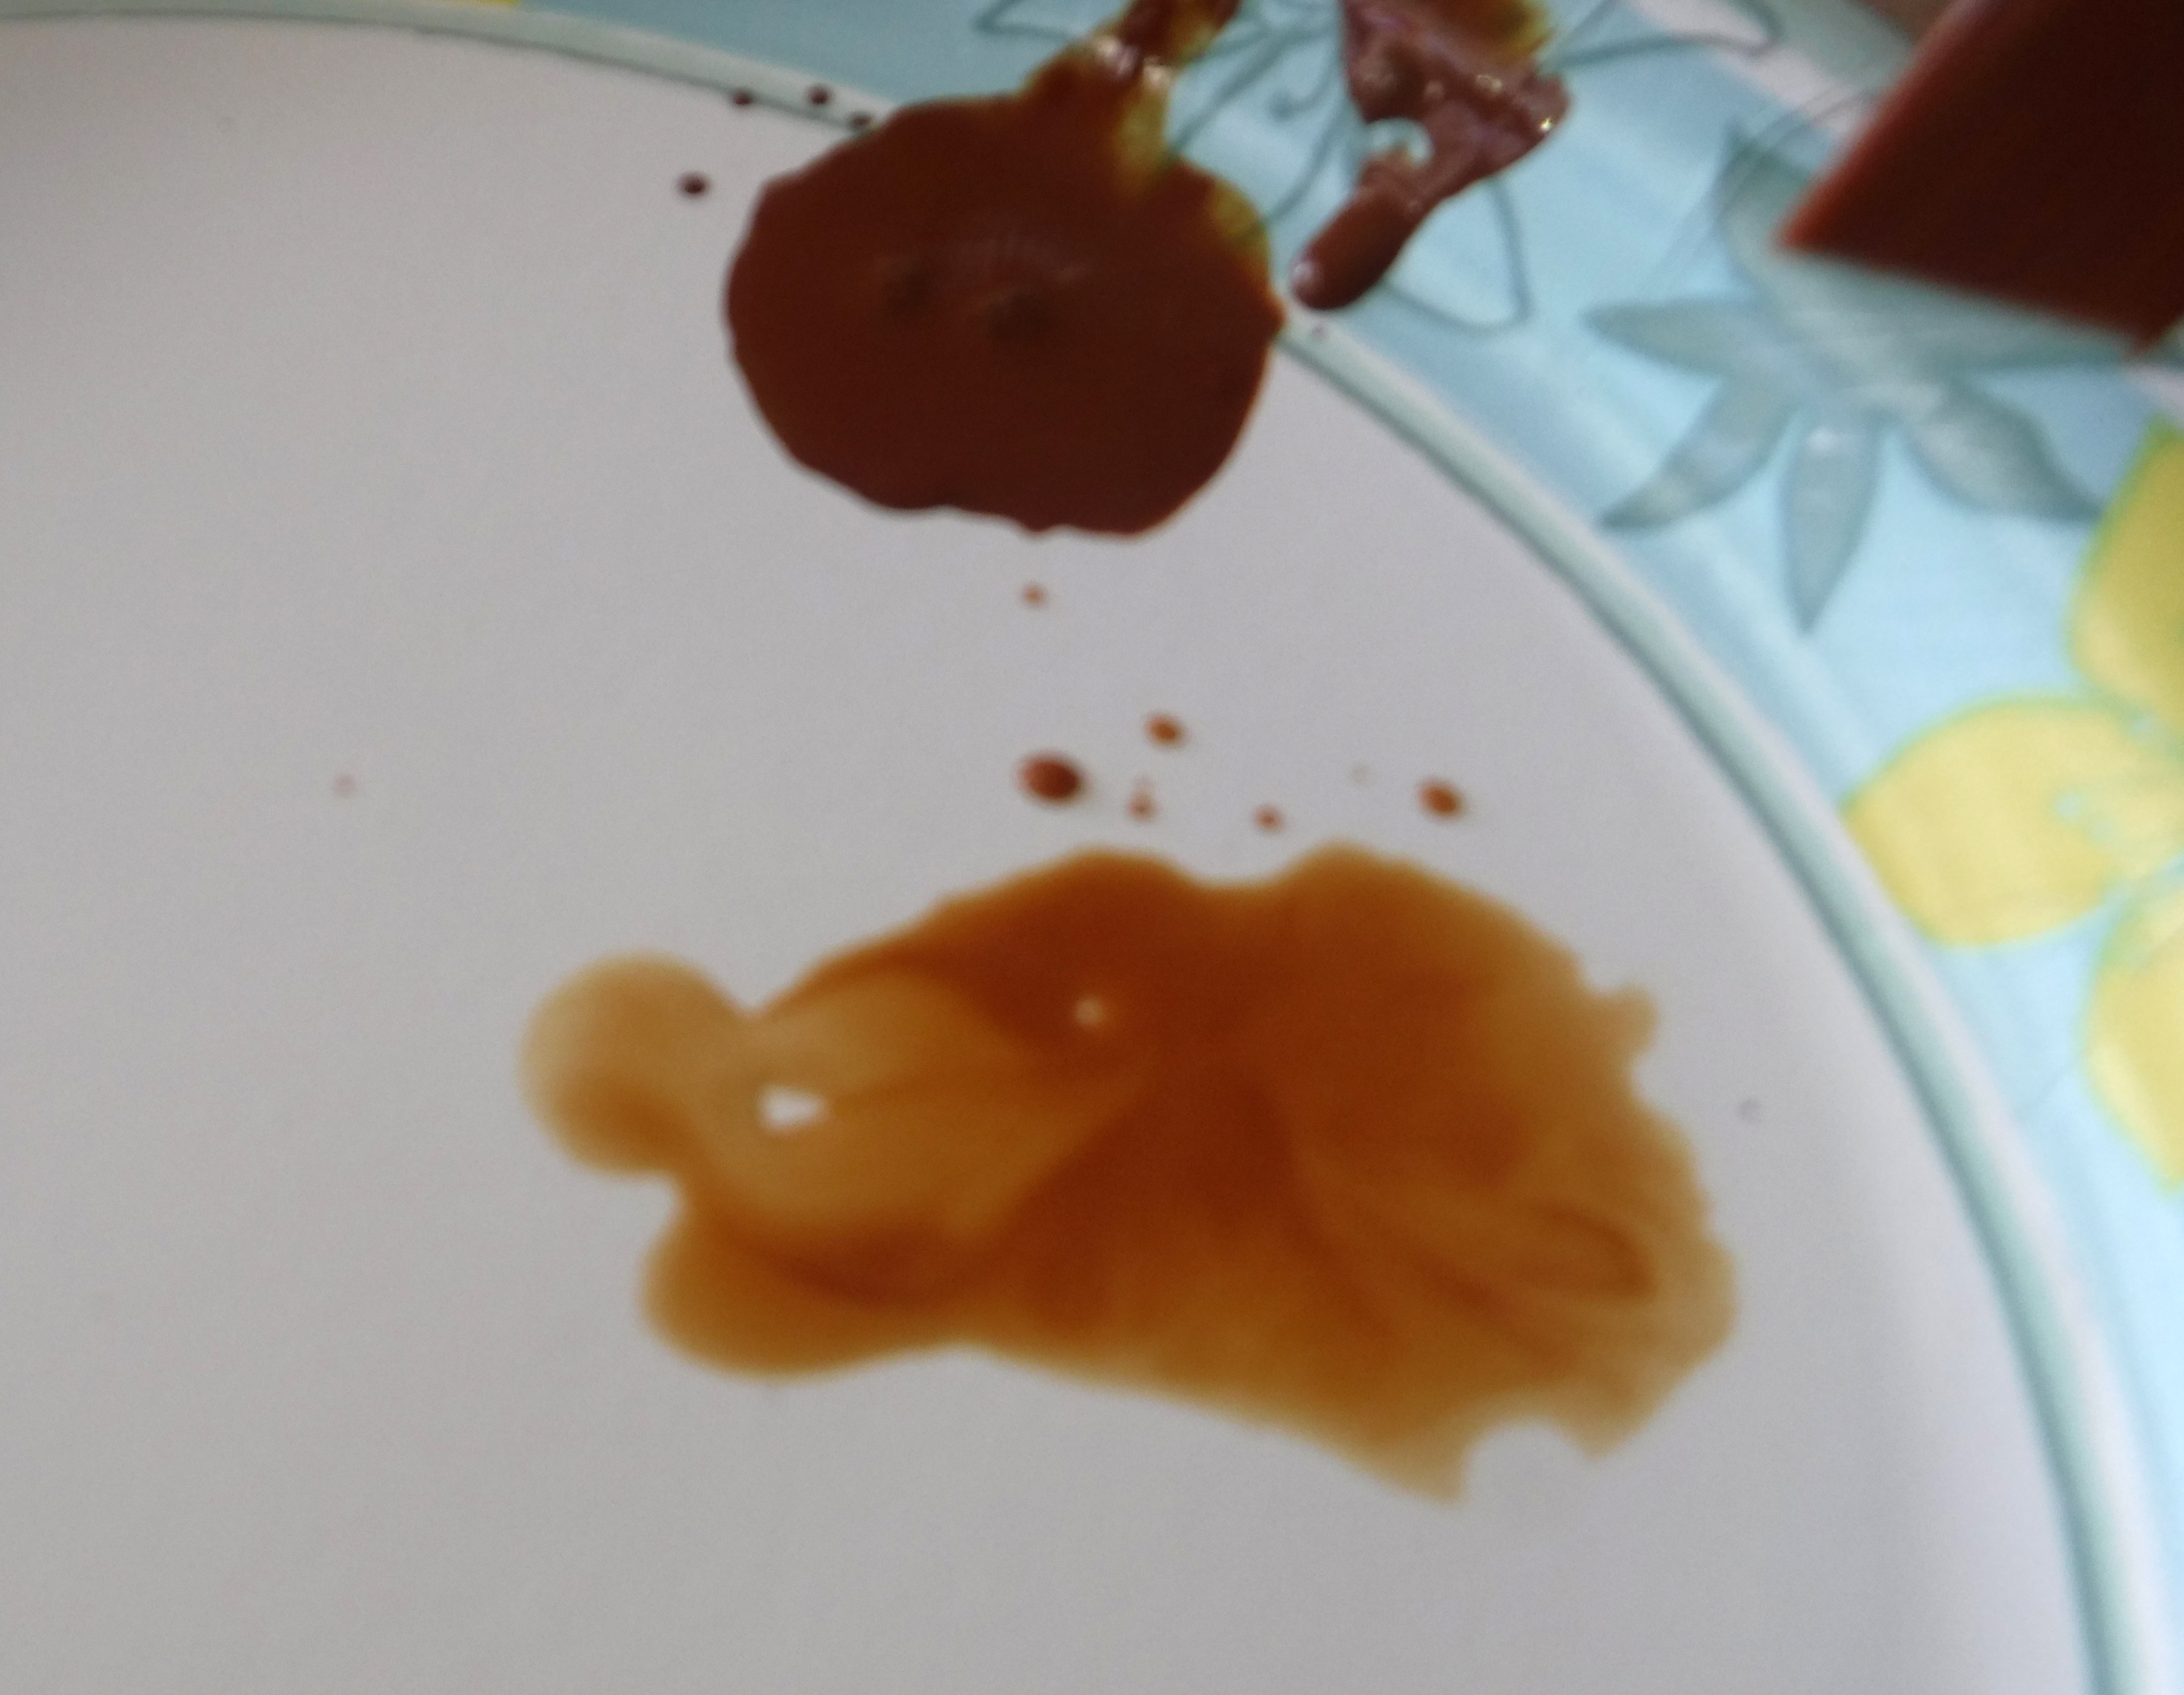
Closely consider this picture of wet paint.
The upper puddle is P3 Bloodstone with a little water in it. The lower puddle is water with a little P3 Bloodstone in it. You’ll be using the lower puddle.
Get your brush sopping wet in the watery Bloodstone puddle. Generously apply that to the Handbrain. You’ll need several brushloads to get the job done.
Keep going until the whole front face is wet, and you’ve got decent puddles hugging the details of the screen (including the details you made with paper and superglue.)
Wait for it to dry. While you wait, look at these two pictures:
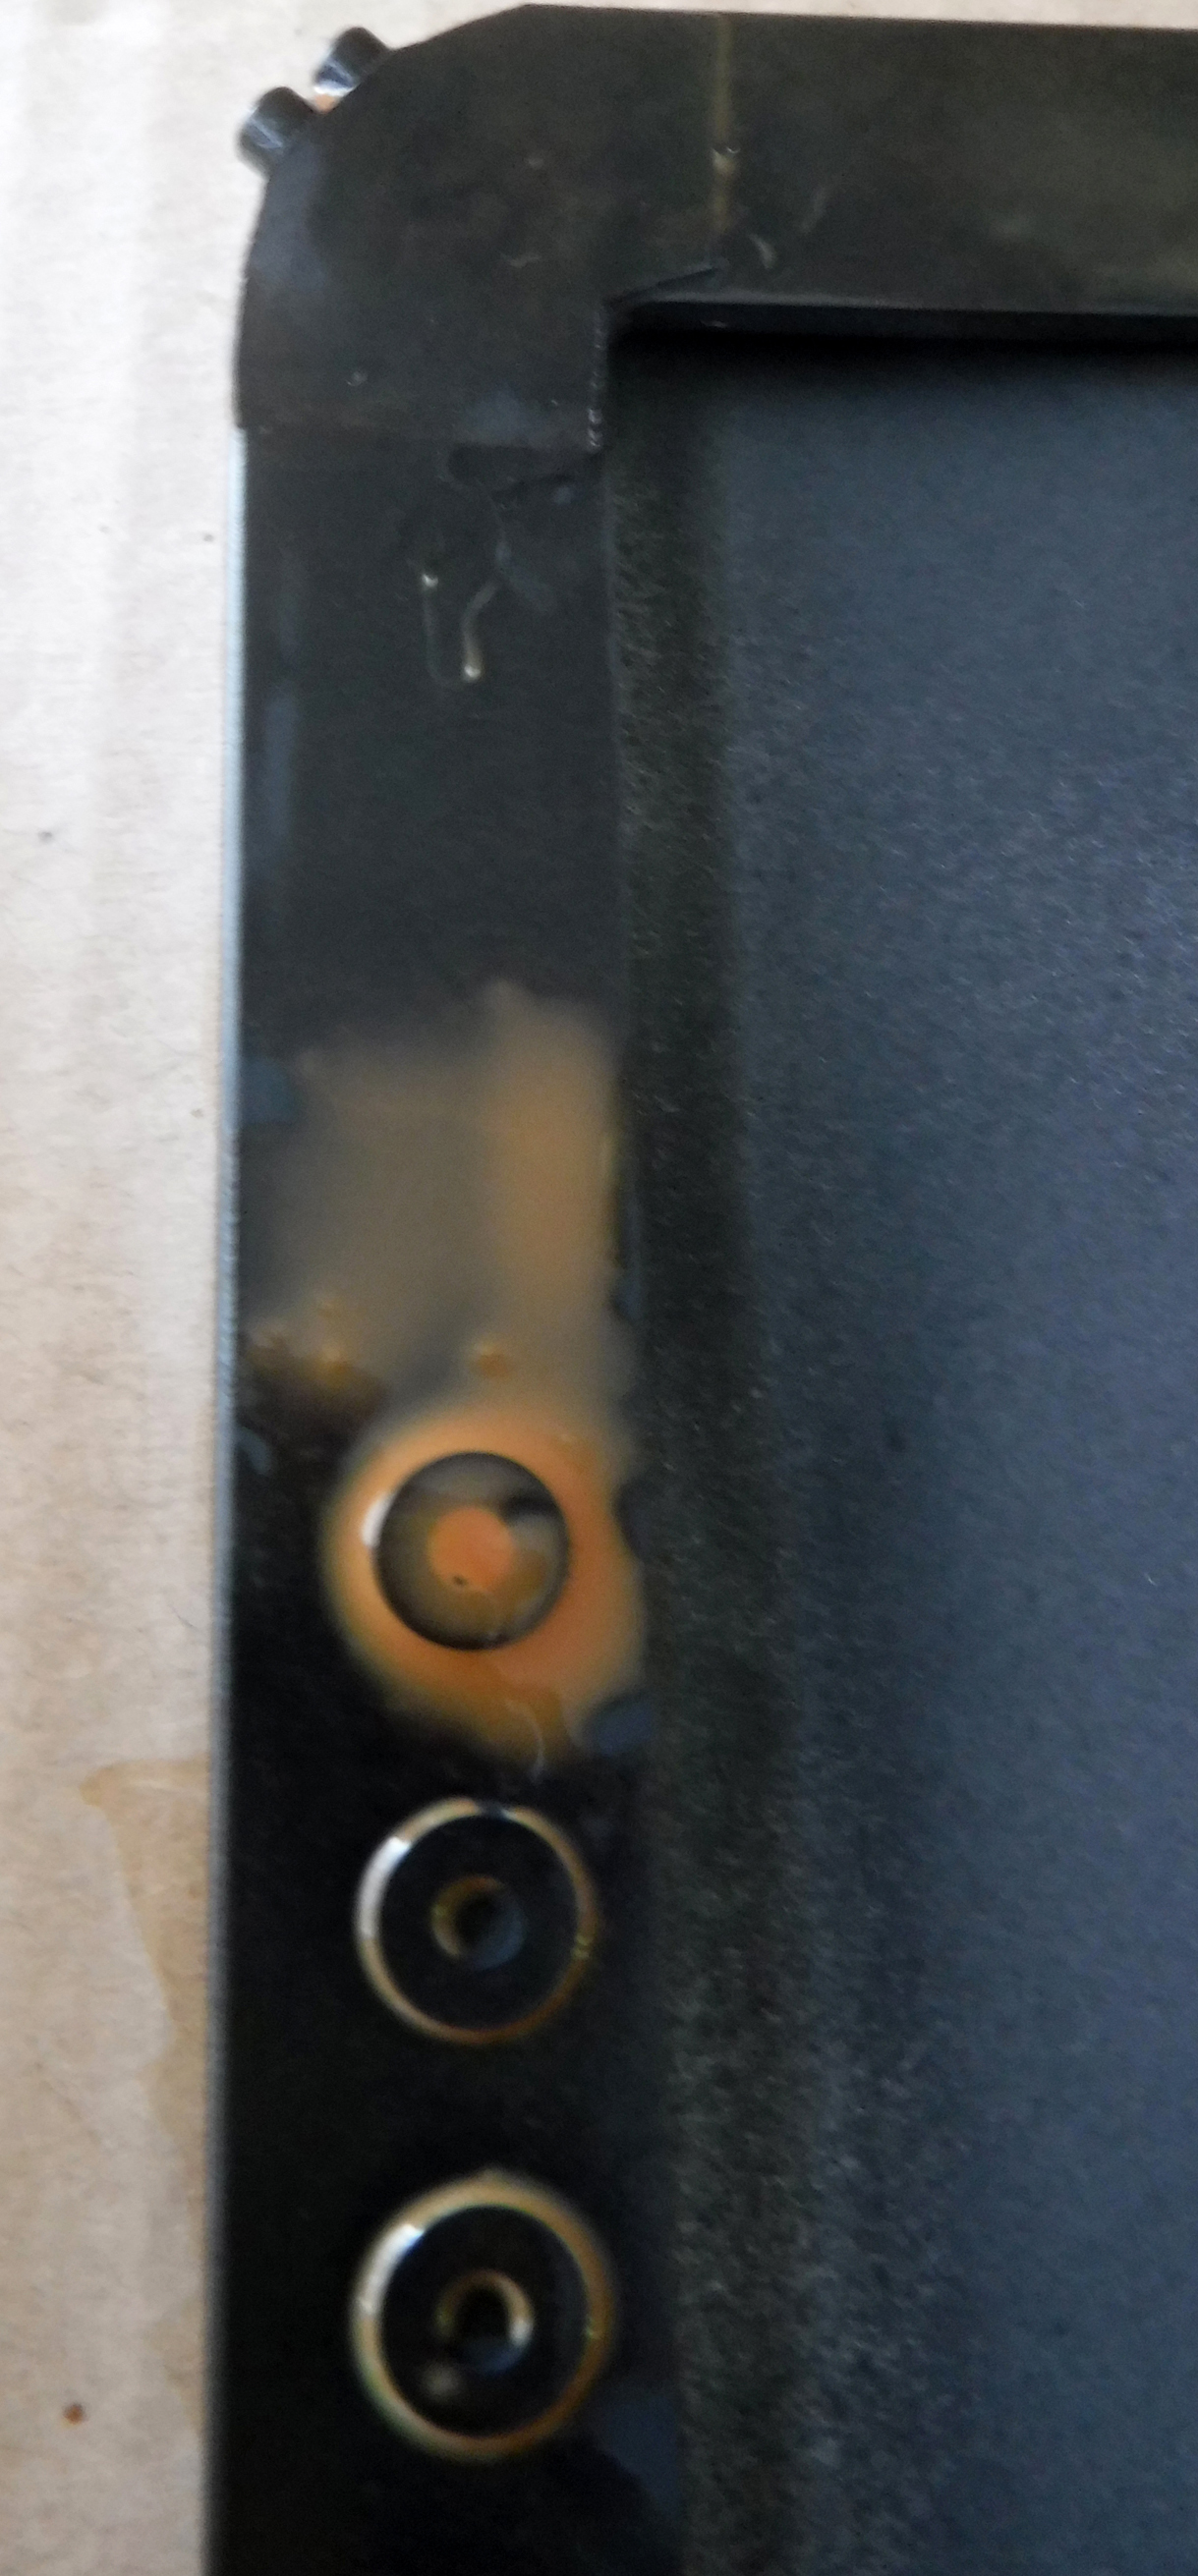
The back of the handbrain, before and after the Bloodstone wash has dried.
Feeling better about the mess? Keep waiting for it to dry. You’ll know it’s dry when you begin wondering where this rusty piece of metal came from.
Repeat steps 3-5 on the back of the screen, complete with more waiting. Also, do the stand now.
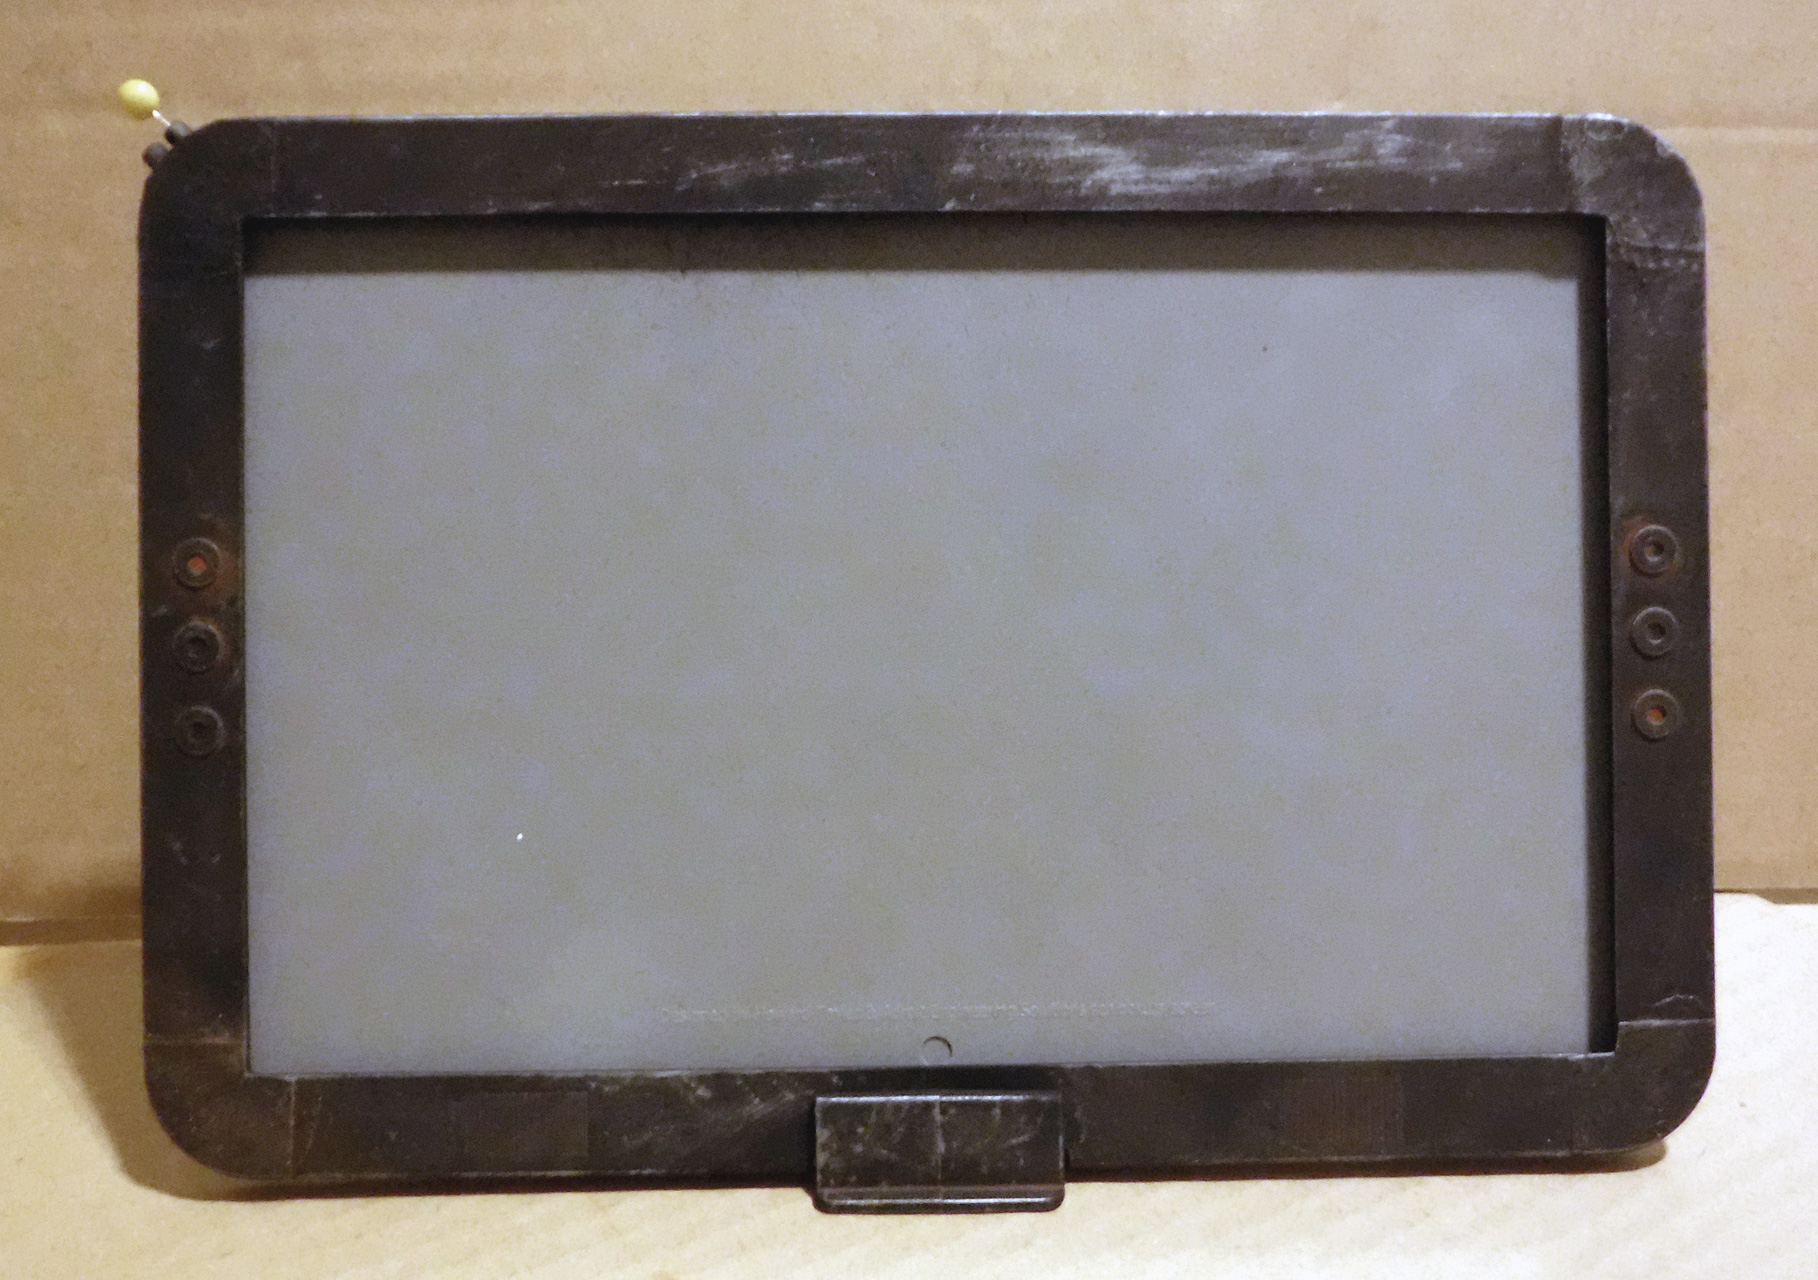
This is what the back of Sandra’s screen looked like in bright light. That’s ABS plastic, superglue, and paint. No slabs of iron were oxidized in the making of this photo.
Phase 5: Shiny Metal Shows Through
In which you learn to drybrush, and possibly get frustrated about having ruined the whole thing, but that’s normal because there’s a learning curve.
Read this aloud: “Learning to drybrush will take a few minutes, and even if I already know how to do it on miniatures, drybrushing something big and flat may prove different.”
Look at this picture (click to enlarge). It is from Sandra’s first-ever drybrushing, and it has awesome bits, and some mistakes.
Realize that by showing you our mistakes, we’re giving you permission to make a whole bunch of your own. Relax…
Get a little paint on your big brush.
With a rapid, back-and-forth motion, paint the paper. You’re getting all the wet paint off the brush, and getting air between the bristles. Keep going until no more paint blotches appear.
Pick up the stand (not the screen) and with that same motion, brush against the “grain” of the screen, your strokes moving at 90° to any raised edges or details. You’ll know you’re doing it right when the edges look shiny, but the flat areas have very little metallic sheen to them.
When the shine no longer appears as you brush it is time to reload your brush. Repeat steps 4-5.
Aren’t you glad you practiced on the small piece? Feeling confident? Good.
Pick up the screen, and drybrush it until you’ve made all the edges shine from the wear-and-tear that shaves oxidized metal away, and polishes what’s underneath.
Here’s what Sandra’s looks like without the paper mask in place. The grey is naked ABS plastic. The rusty metal is not actually metal. Neat, huh?
Finished dry-brushing!
Phase 6: Make It Durable
Because you want to play with it, not just put it up on a shelf for display, right?
Return to your spray-painting place. It needs to be ventilated well, because this paint is pretty smelly.
If you removed it the paper from the screen, put it back in now.
Lightly spray the screen and its base with Testor’s Dullcote spray lacquer.
Make sure to spray the part where the base covers the screen.
Let it dry.
Testors Dullcote is my absolute favorite protective finish for models like this. It drys to leave a very flat, matte finish. Reflected light won’t be obscuring the paint job you worked so hard on. It shows off your work, while protecting the model from ordinary wear-and-tear. I like it so much I’ll totally shill for it, as evidenced by the linked text. I’ve used other matte finishes, but none are as purely non-reflective as Testor’s.
Summary
I often refer to this process in a way that omits all the persnickety details: “base coat, wash, drybrush, done.” For folks familiar with the hobby, that’s enough to get the point across.
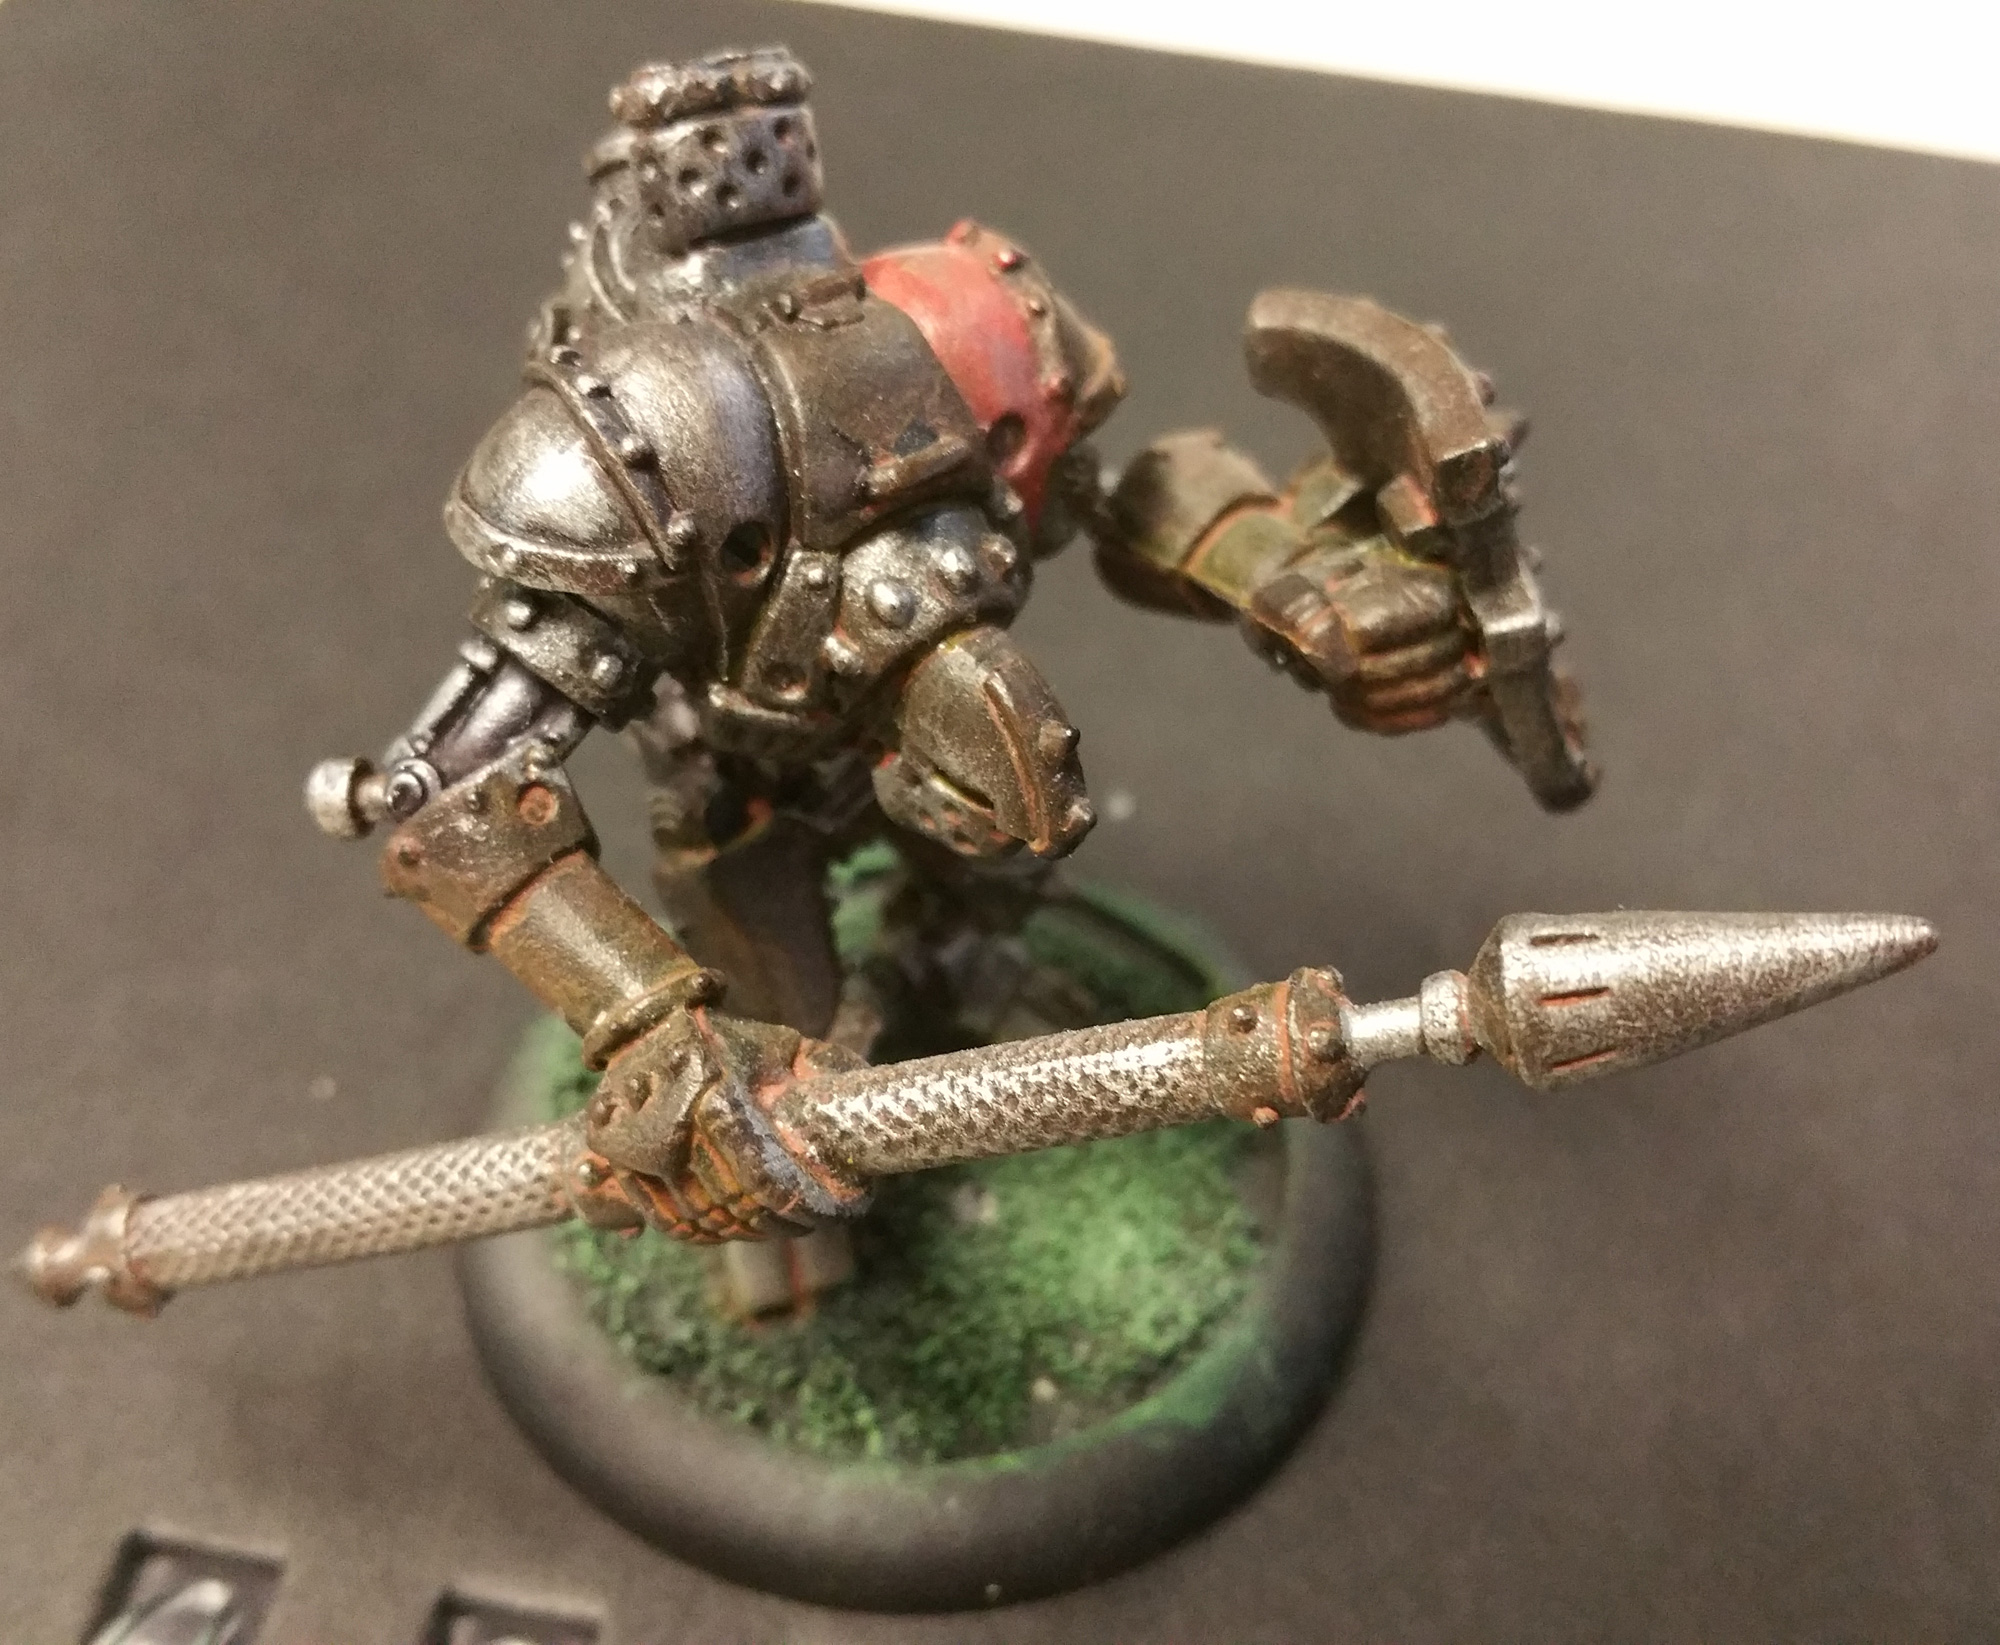
This process works quite well on 28mm miniatures. Often I’ll start by doing the rusty look, and then add colors to the parts of the mini that are not supposed to be weathered metal. Sometimes I’ll forget that the model isn’t actually finished, and it’ll stay in the rusty metal state for several years. Yes, Cygnar Lancer warjack, I’m looking at you. As is everyone else…
Cygnar Lancer warjack from Privateer Press. Photo, May 2017. Stopped painting sometime in 2013, or maybe earlier.
It’s not the only way to get this look, and it’s not even necessarily the best way, but after lots of experimentation, it strikes the right balance between “easy” and “the right look,” at least for me.