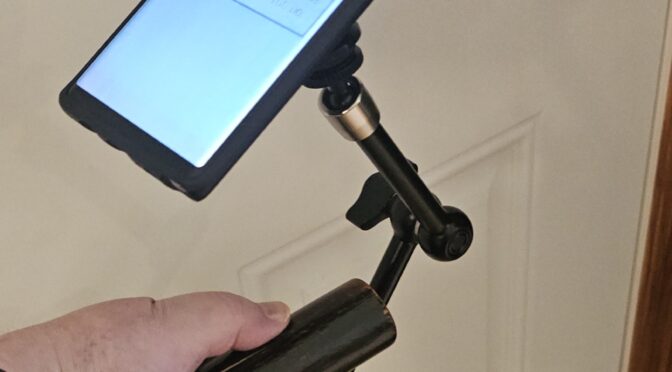
The Technocane is what happened when, in my own words, “I taught my stick how to carry my phone so that my phone would teach me to never leave home without my stick.
This page is a parts list and a quick instruction set for building your own.¹
The Type I Technocane
The simplest Technocane to build is the Type I: take a cane or walking stick that already fits your hand, your height, and your needs, and simply attach a piece to it to carry your phone. Here are the parts you’ll need:
- SmallRig Magic Arm
- Photographer’s Tripod “Thumb-Nut” (metal, not plastic)
- Coolpow magnetic Dashboard Phone Mount
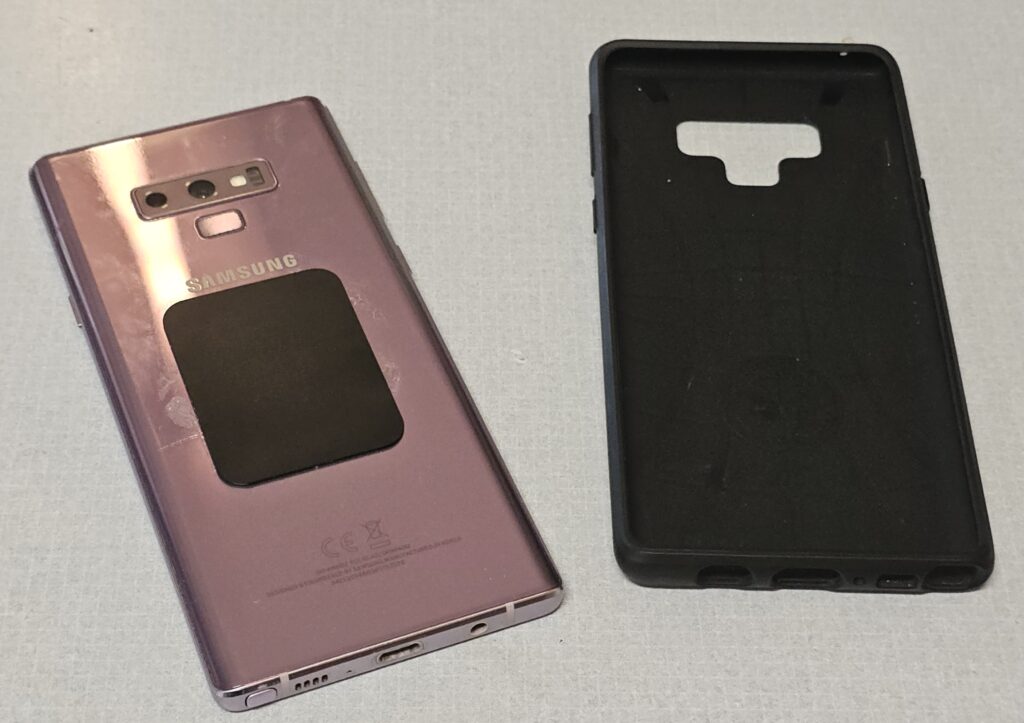
- Phone case or back-plate compatible with magnet mounts
- A rubber band (optional)
- Your cane
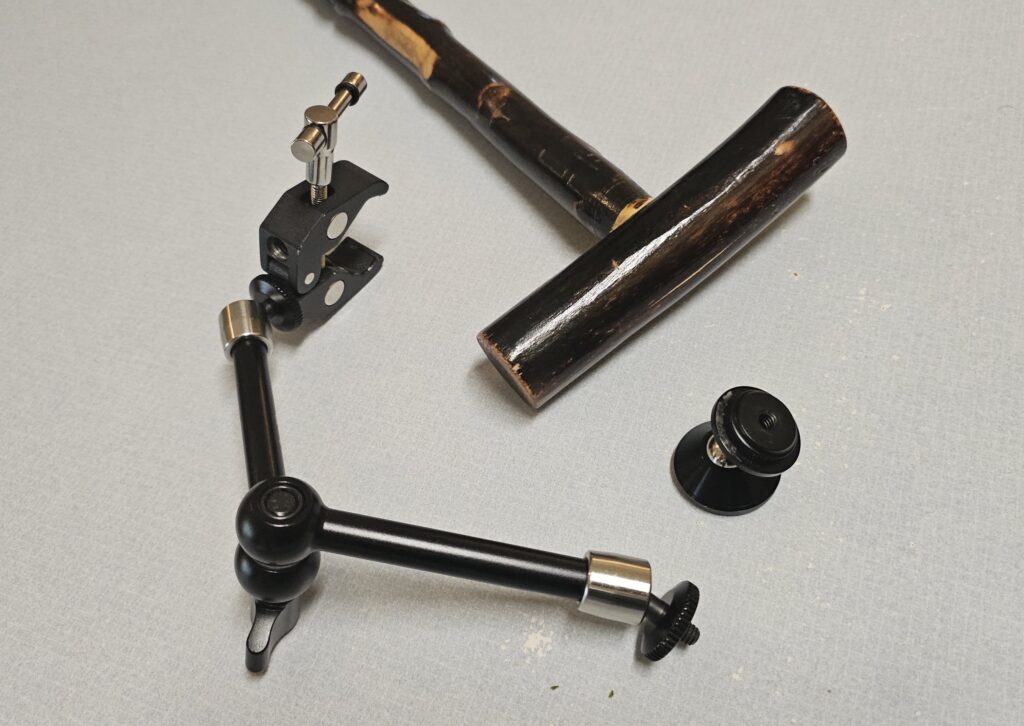
You’ll also need some simple tools
- Superglue (you’ll only need a couple of drops)
- Hobby Knife or File or Box Cutter (to improve the glue bond)
- Pliers (depending on your hand strength you may or may not need these)
Summary of What’s Coming
It’s pretty simple. You’re going to remove the tape from the dashboard mount, glue the thumbnut to it, and screw that assembly to one end of the Magic Arm. The other end of the arm clamps to your cane, and the rubber band gets wrapped around the clamp lever to keep it from rattling. And that’s it. Now, the details:
Instructions: Mag-mount Prep
Before beginning, make sure that your phone case will securely mount magnetically to the Coolpow component. If it won’t there’s no point proceeding until you have a phone case that will work².
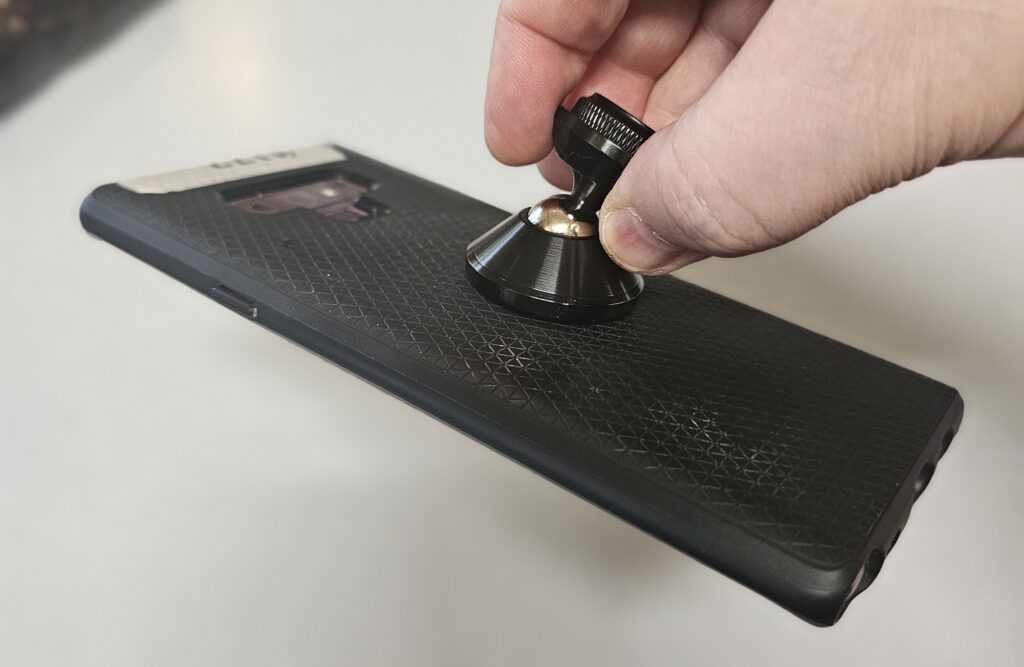
- Remove the tape. Take the Coolpow mount and peel all the sticky backing off of the side that attaches to the dashboard. This takes about five minutes, and is easily the most tedious part of the entire project.
- Score the mount: With your knife, file, or cutter, carefully score the now tape-free dashboard side of the mount. Lots of little lines in a couple of directions.
- Score the nut: Score one side of the metal thumb nut, same as with the mount.
- Glue the nut to the mount: Glue the scored side of the thumb nut to the dasboard mount. Take care to align the screw hole with the (now exposed, it was hiding under the tape you removed) recess in the dashboard mount. This will give the screw on the Magic Arm room to screw in past the the thumb nut without pressing against the mount and popping the nut off.
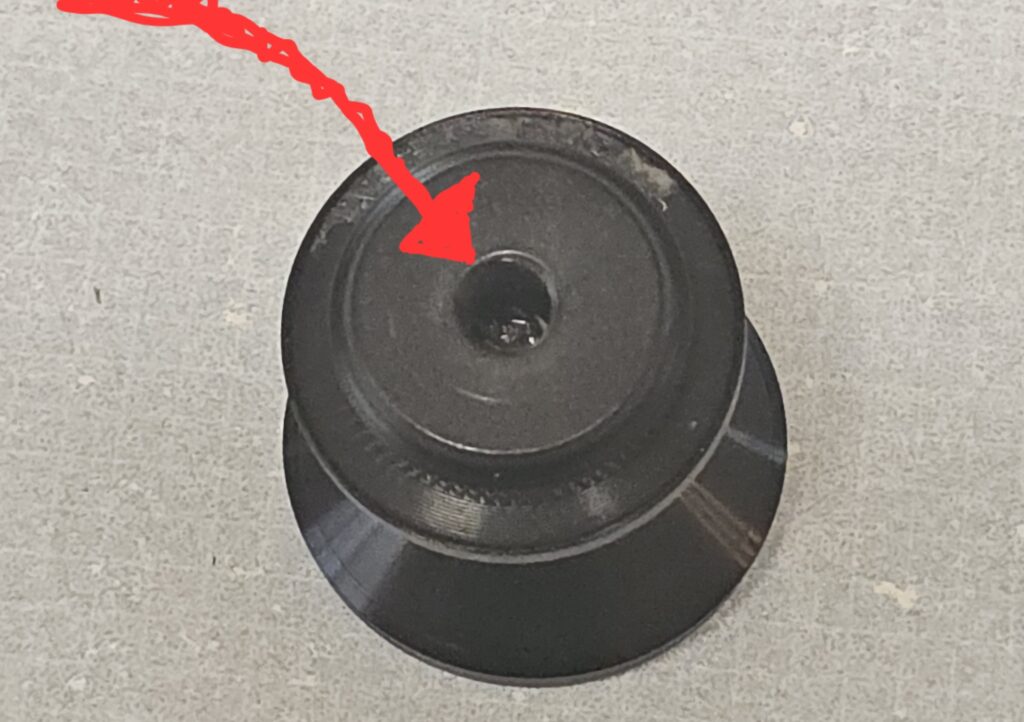
Those four steps should take maybe six or seven minutes. Wait another five minutes before proceeding. The superglue needs a bit of time to cure, especially if you used too much.
Instructions: Assembly
Here’s where you attach the mounting magnet to the arm, and the arm to the cane. It should go very quickly.
- Loosen the Magic Arm using the adjustment knob at the elbow. Extend it to be straight, then tighten it back up. This will make everything else easier.
- Attach the mount to the arm: Screw the magnetic mount assembly onto the SmallRig Magic Arm. There’s a thumbnut on the Magic Arm already, and it has silicone grippy-rings in it. These should let you screw the mount down securely by hand. The silicone pushes back against the nut “jamming” the threads.
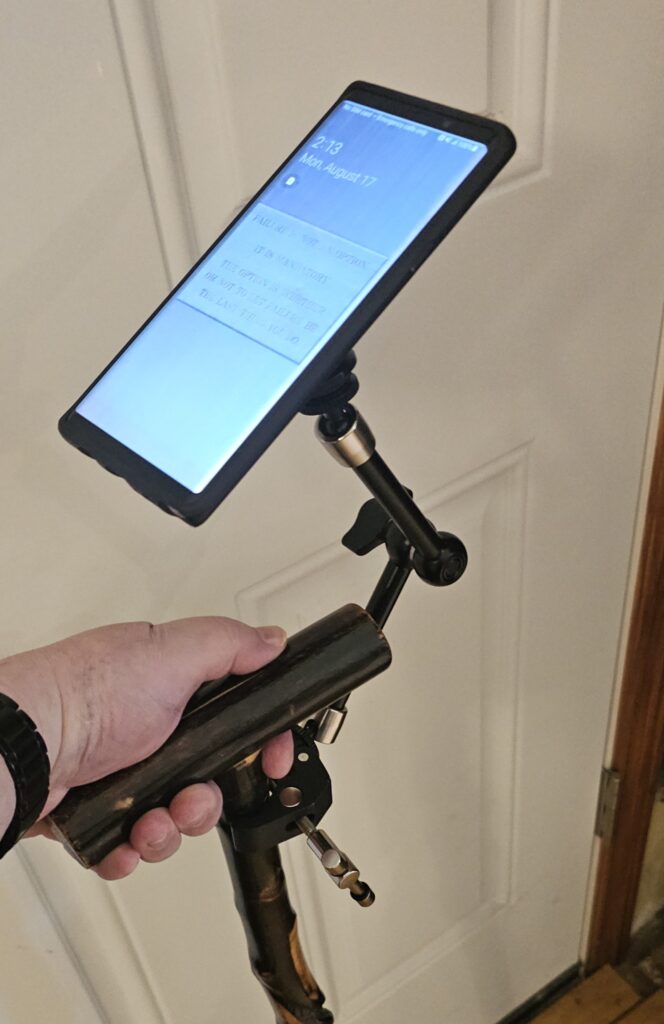
- Attach the arm to your cane: Spin the lever on the clamp and open it wide enough to clamp to your cane. Slide it onto the shaft just below the handle, where you won’t be hitting it with your knuckles when you hold the cane. Aim the arm in the opposite direction of the handle, so it points forward when the cane is in use. Tighten the clamp.
- Arrange the Magic Arm to reach forward and up: Using the adjustment knob at the elbow, bend the arm up and forward, keeping the arm in the same plane as the cane handle. Note that there are some slots in the ball joints that wil allow more movement in one direction, should you need it.
- Mount your phone on the magnet: just place your phone on that mag-mount. Check and see if it’s where you want it. If it’s not, adjust the arm again.
- Once it’s all aligned, tighten everything: Screw that elbow knob down as tightly as you can. Tighten the clamp some more. Make sure the mount is screwed tightly to the Magic Arm. Take the rubber band and wrap it around the clamp lever to keep the lever from jiggling and making noise.
Care and Feeding
Maintenance is pretty simple. Here are the things that are most likely to need attention:
The clamp-to-arm screw. This will tend to loosen over time. You have all the leverage, though. Use the arm as a lever. Tighten the elbow HARD, then lean on that lever and screw the ball joint into the clamp just as tightly as you can. This will take the arm out of alignment with the cane, but that’s easy to fix. Loosen the elbow (which loosens the ball joint, but not the screw), re-align it, then tighten it back up.
The magnet-mount screw. Again, it may loosen over time. Pliers might help here.
The nut-to-mount glue bond. Superglue bonds are very strong, but they’re brittle, and may get more brittle with time depending on the glue, the temperature, the humidity, etc. The easiest way to maintain this is to build a spare. The Coolpow magnets come in two-packs, and photography thumbnuts are maybe a buck each. The good news: I’ve only had one of these bonds fail on me, and I’ve glued at least a dozen thumbnuts to Coolpow magnets.
The Coolpow Magnet: This is a silicone cap over four rare-earth magnets. If you aim this at a big, high-strength bar magnet the magnetism will overpower the chemical and mechanical bond that keeps the silicone cap attached to the cup. This is annoying to fix, so 1) don’t aim your cane at large bar magnets, and 2) build a spare, just in case.
The clamp-to-cane joint: If you have a hollow aluminum, steel, or carbon-fiber cane, that clamp can crush it if you crank the lever hard enough. If you’ve dented the cane by over-clamping, then from time to time you may want to check and see that the cane isn’t deforming further. The failure mode here is the cane head bends or breaks and you fall down. It’s super-unlikely, but it’s worth paying attention to. If you have a solid-core cane (wood or whatever) then this won’t happen.
Field Notes
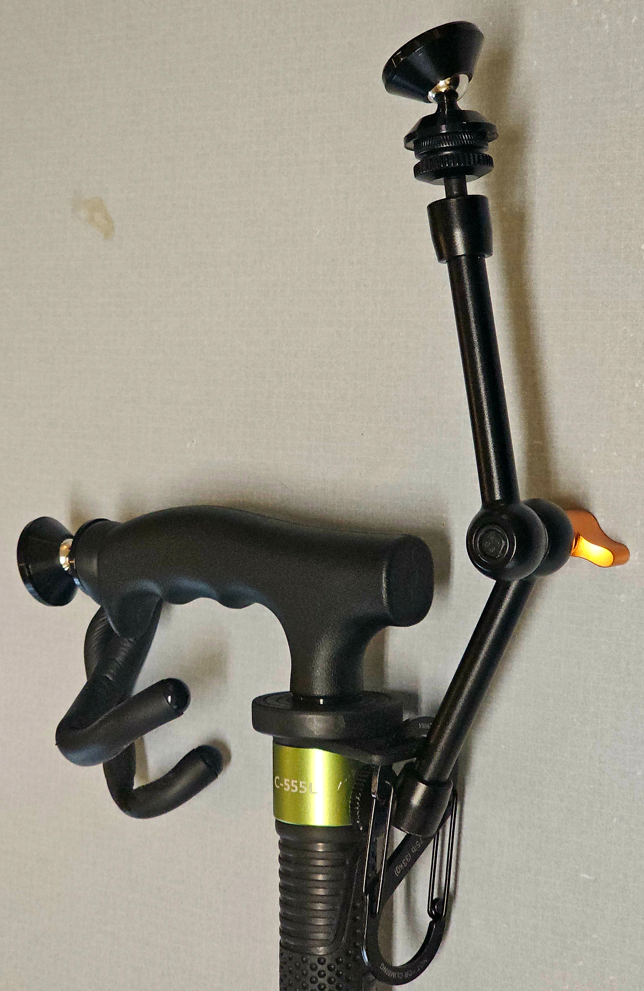
I’ve been using the Technocane for almost four years now. I built mine using a monopod, and I iterated a LOT before I found something that worked. My personal Technocane is the Mark XII Type II, a carbon-fiber Manbily Monopod with the Magic Arm screwed directly to a hardpoint on the monopod.
“Mark XII, you say?”
Yes. Mark XII. Twelve major iterations before I arrived at the current design. Early on I tried phone clamps instead of magnets, but they failed quite often, and mounting the phone took two hands (not good, I need one hand on the cane to hold me up.) I think I spent close to $800 on trial-and-error before getting here.
I can now build the Type II Mark XII in about 45 minutes, and it costs around $110. Why, yes, I’ve built a spare, and I have a Type I on the bench as well, just in case. See, once my phone taught me not to leave home without my stick, I realized that spare sticks were just as important as spare shoes, or an additional set of car keys.
Is it perfect?
No.
I’ve knocked the phone off the magnet more than I care to admit. Fortunately my magnet-compatible case provides good protection, and if I’m being honest with myself it’s infinitely more likely that I’ll fumble the phone from my hand if I’m trying to use the phone while holding a regular, non-technocane cane.
But I do want to build a fix for the “knock the phone off the magnet” failure mode. I’ve already built it in my head. I just need a machine shop, because this isn’t gonna work with off-the-shelf components.
And that’s beyond the scope of this article. Let’s get back on track.
Brands, Off-Brands, and Substitutions
I listed what I listed because I’ve tested a lot of things. Please, save yourself some time and just use the brand names and the specs I described. Here’s why:
Smallrig & Coolpow vs Other Brands: I’ve used three different brands of “Magic Arm” and four or more of the magnet mount, and here are my findings: Buy SmallRig and Coolpow.
– Smallrig end-pieces, the ones that hold the ball joint in place, are one solid metal piece. Other brands are TWO pieces, and will break when over-tightened, rendering the arm useless.
– Coolpow magnet containment (the silicone cap) is pretty reliable. It has failed me once, and only when I docked it on another Coolpow magnet. Off-brand has failed five times, and three of those were regular use. The cap and the magnets ended up stuck to a steel door.
Metal vs Plastic thumbnuts: Don’t bother with plastic. It’s less sturdy than the glue bond, and plastic degrades rapidly with things like sunlight, air, and time. Anodized aluminum is the way to go.
Superglue vs Epoxy, B-7000, etc: Superglue is easy, it’s fast, and it’s pretty hard to break that bond. Epoxy isn’t as brittle, but it doesn’t seem to grab the surfaces as well. B-7000 is flexible and amazing and don’t bother, it’s for gluing electronics together, not for load-bearing stuff.
Footnotes
¹ I don’t sell anything here. I don’t sell the components, I don’t sell the instructions, I don’t sell the finished product, and I’m not paid for the Amazon links. A cane is a medical device, and is rightly subject to all sorts of product testing, registration, and licensing. I’m not in the medical device business, and you don’t need me to be, because you can build your own without worrying about that.
² The Coolpow mount is not designed to work with cases that allow for cordless phone charging. Mounts that ARE designed for that use a ring of magnets, and require phone cases with a similar ring that goes around the charging coil without interfering. If you can find a mount like that with a base that can be glued to a thumb-nut (or that already has a 1/4″x20 screw hole), then you can use that instead.